It’s that season again where we crafters get to show off and share our creations! 🙂
I don’t know about you, but for me, every year I have so much hope for the perfect creation that I get paralyzed in my own thought process. The added pressure is the time limitation factor and my biggest fear is that I would end up at a Hallmark store buying Christmas cards to send to friends. Don’t get me wrong. There is nothing wrong with Hallmark cards, but for a crafter like myself, homemade cards are special and are gifts in themselves from my heart to my dear friends and loved ones.
How about you? Have you already finished sending out your Christmas cards? Maybe you want to create your own cards but find yourself having a “creation block”? It’s not too late! Here’s one Christmas card idea I created and want to share with you.
What you will need:
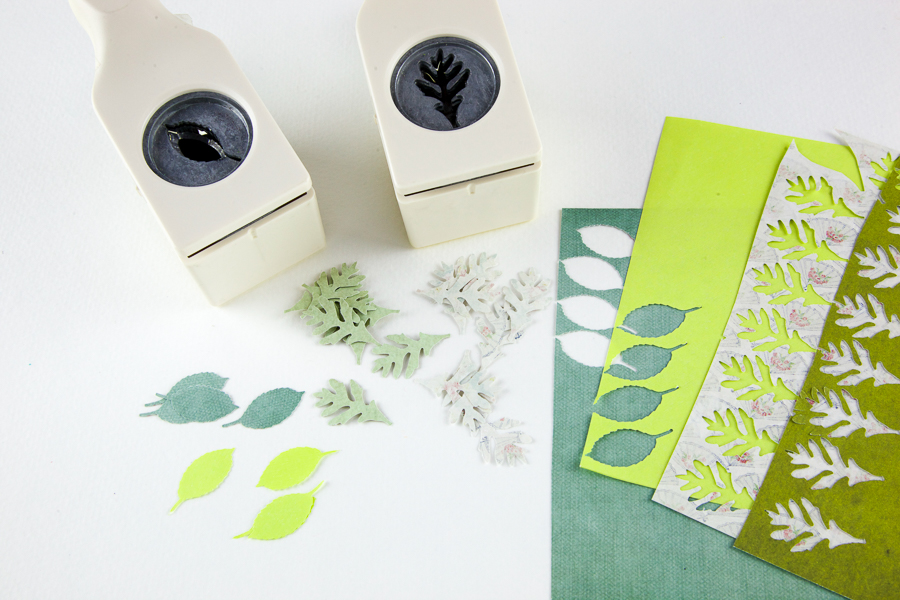
2 leaf punches (I used Martha Stewart punches)
4 different tones of green scrapbooking paper
2 different tones of red scrapbooking paper
2 different tones of brown scrapbooking paper
1 sheet of patterned scrapbooking paper for the backing horizontal borders of your card
1 coffee sleeve (to cut out in a ring shape for the wreath)
Copic Markers (or any coloring markers or pencils you would like to use) and a fine point black Sharpie pen
Glue, scissors, brown paper, and hole puncher
Let’s begin!
1. Punch out leaves using leaf punches and different color green paper to make the leaves for the wreath.
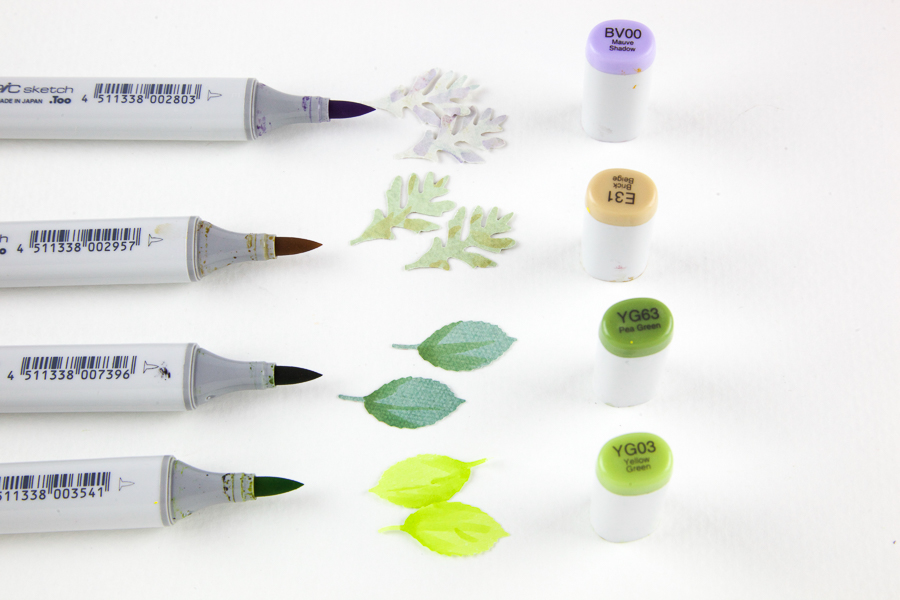
2.Add some colors to shade the leaves with copic markers to create a 2-dimenional effect (see above). If you don’t have marker, any color pencils would work.
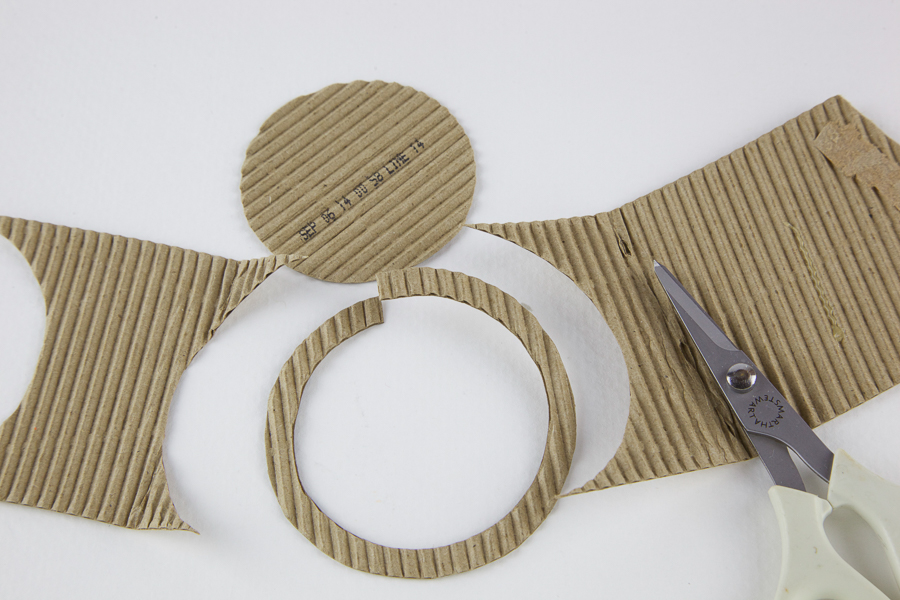
3. Trace a circle on your coffee sleeve and cut it out with scissors (see above). My card is about 4×6 inch in size, so for my card, I cut out a circle that is about 2-inches in diameter.
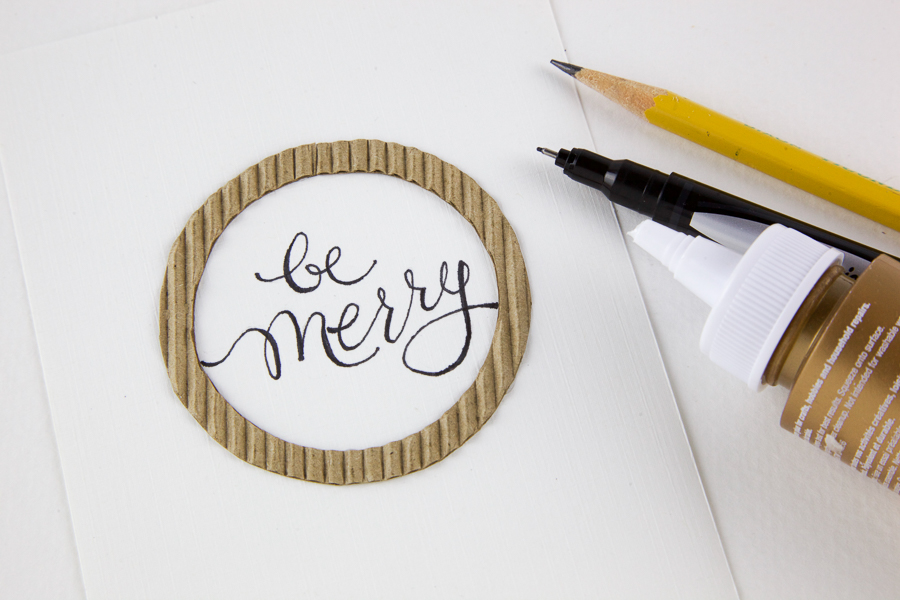
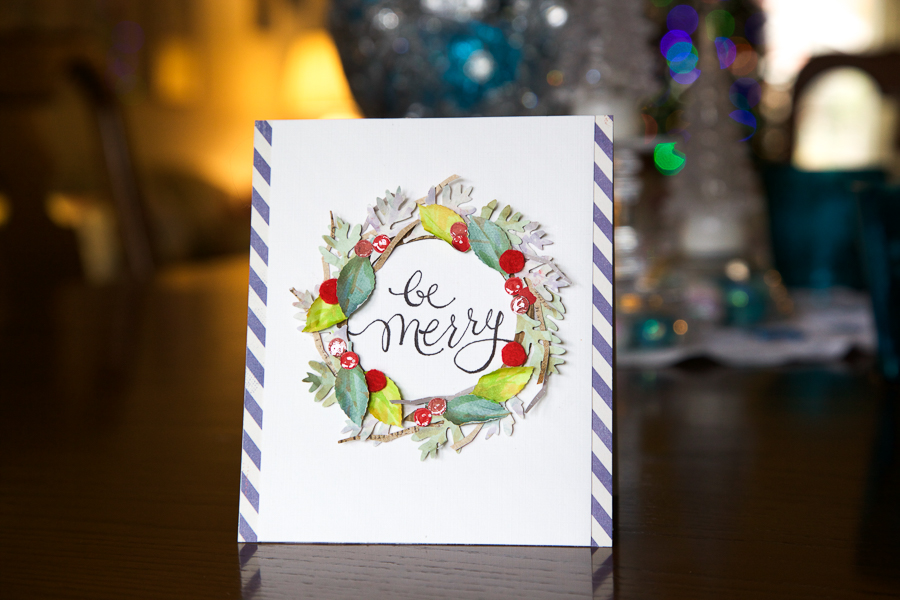
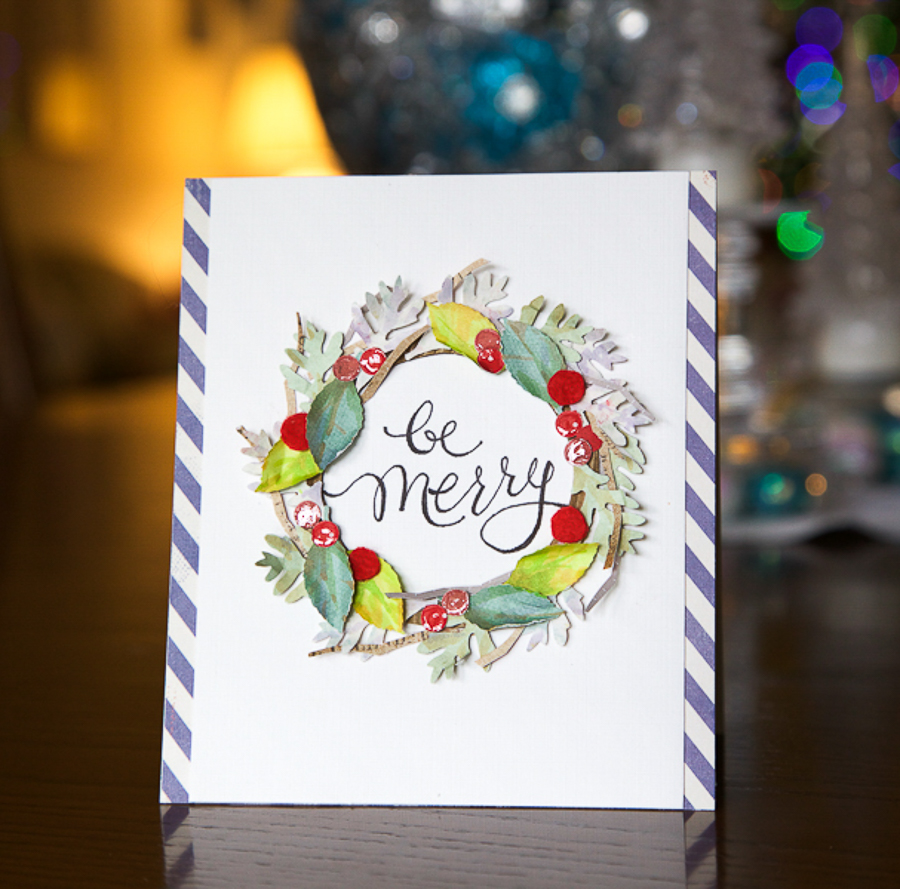
4.Glue the cut-out ring shape onto your white card stock and write the message. As I am not a calligrapher, I wrote my message in pencil first and then traced it with a Sharpie marker. If you have a Christmas message stamp, use it because it may make your life easier! 🙂

5. Glue one type of leaf on your wreath frame as shown above.
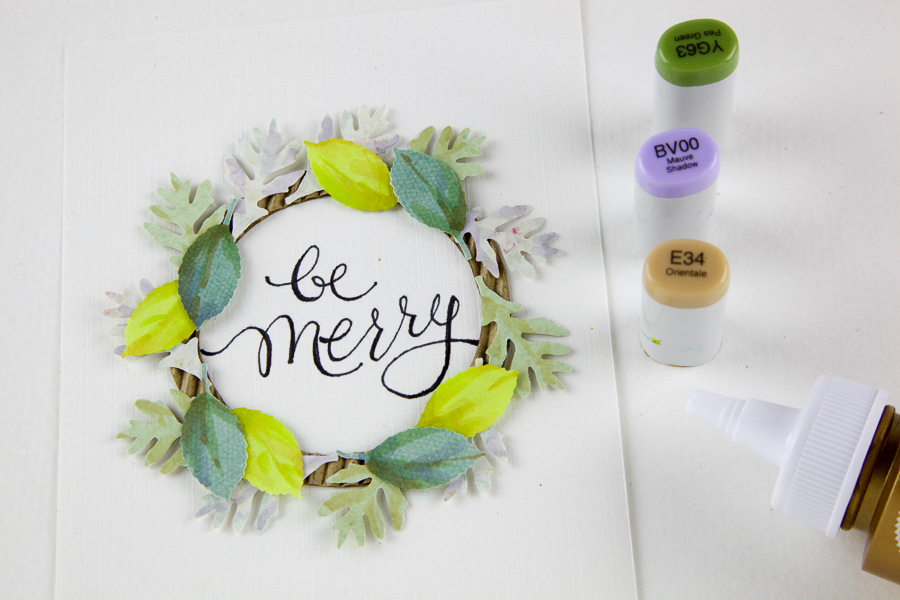
6. Then glue on another layer of different types of leaves in the opposite direction. To make it look real, I colored the leaves a ittle more to create some additional shading on the leaves.
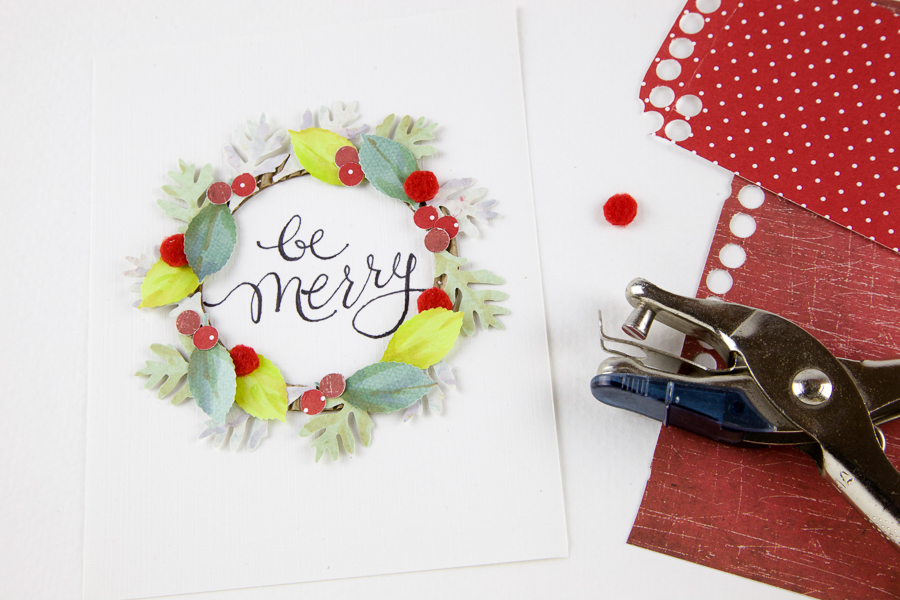
7. Using a hole puncher, punch out red berries with different tones of red to create depth and a more realistic look.
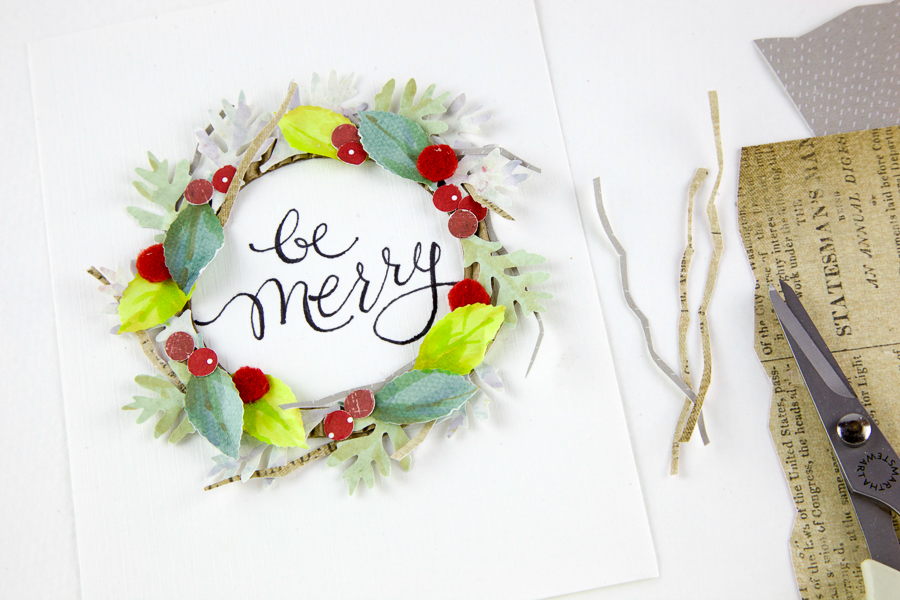
8. Glue those berries, grouping and spacing them as you like. Then cut out branches from any brownish paper you have (as shown above). Here I used about 4-6 branches and glued them under the leaves.
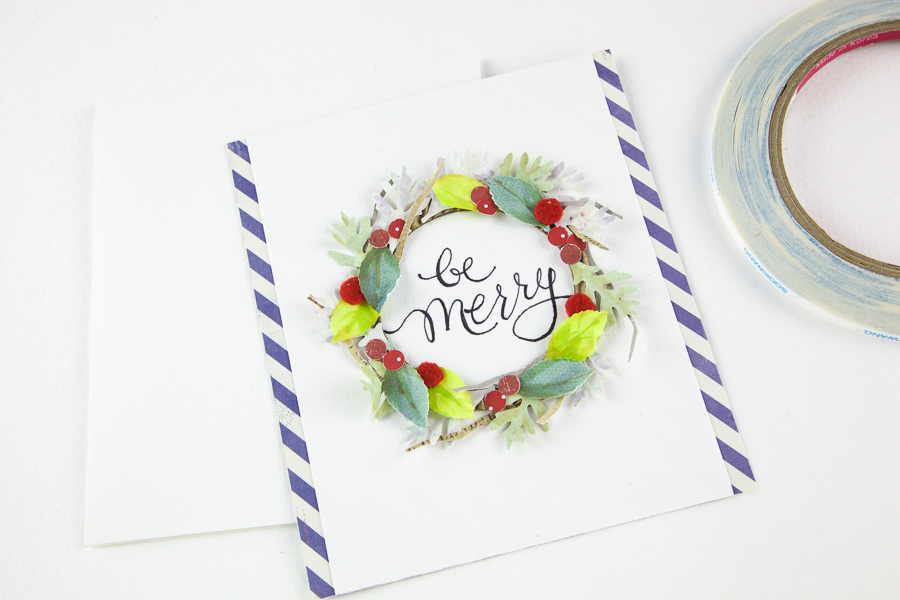
9. Cut out a larger size scrapbooking paper to create horizontal borders for your card. Here I used blue striped scrapbooking paper and glued my cardstock paper on top. Done!
Thank you for stopping by.
Minki
this is so beautiful.. thank you for the tutorial .. 🙂
This is an adorable card. Thank your for the tutorial.
I see many sites outrank your blog in google’s search results.
You should build more contextual backlinks. These type of backlinks are the
most valuable after all these google algorithm updates.
I know writing articles is hard work, but i know what can help you save a
lot of time, search in google for:
Jyengmos’s Rewriter