
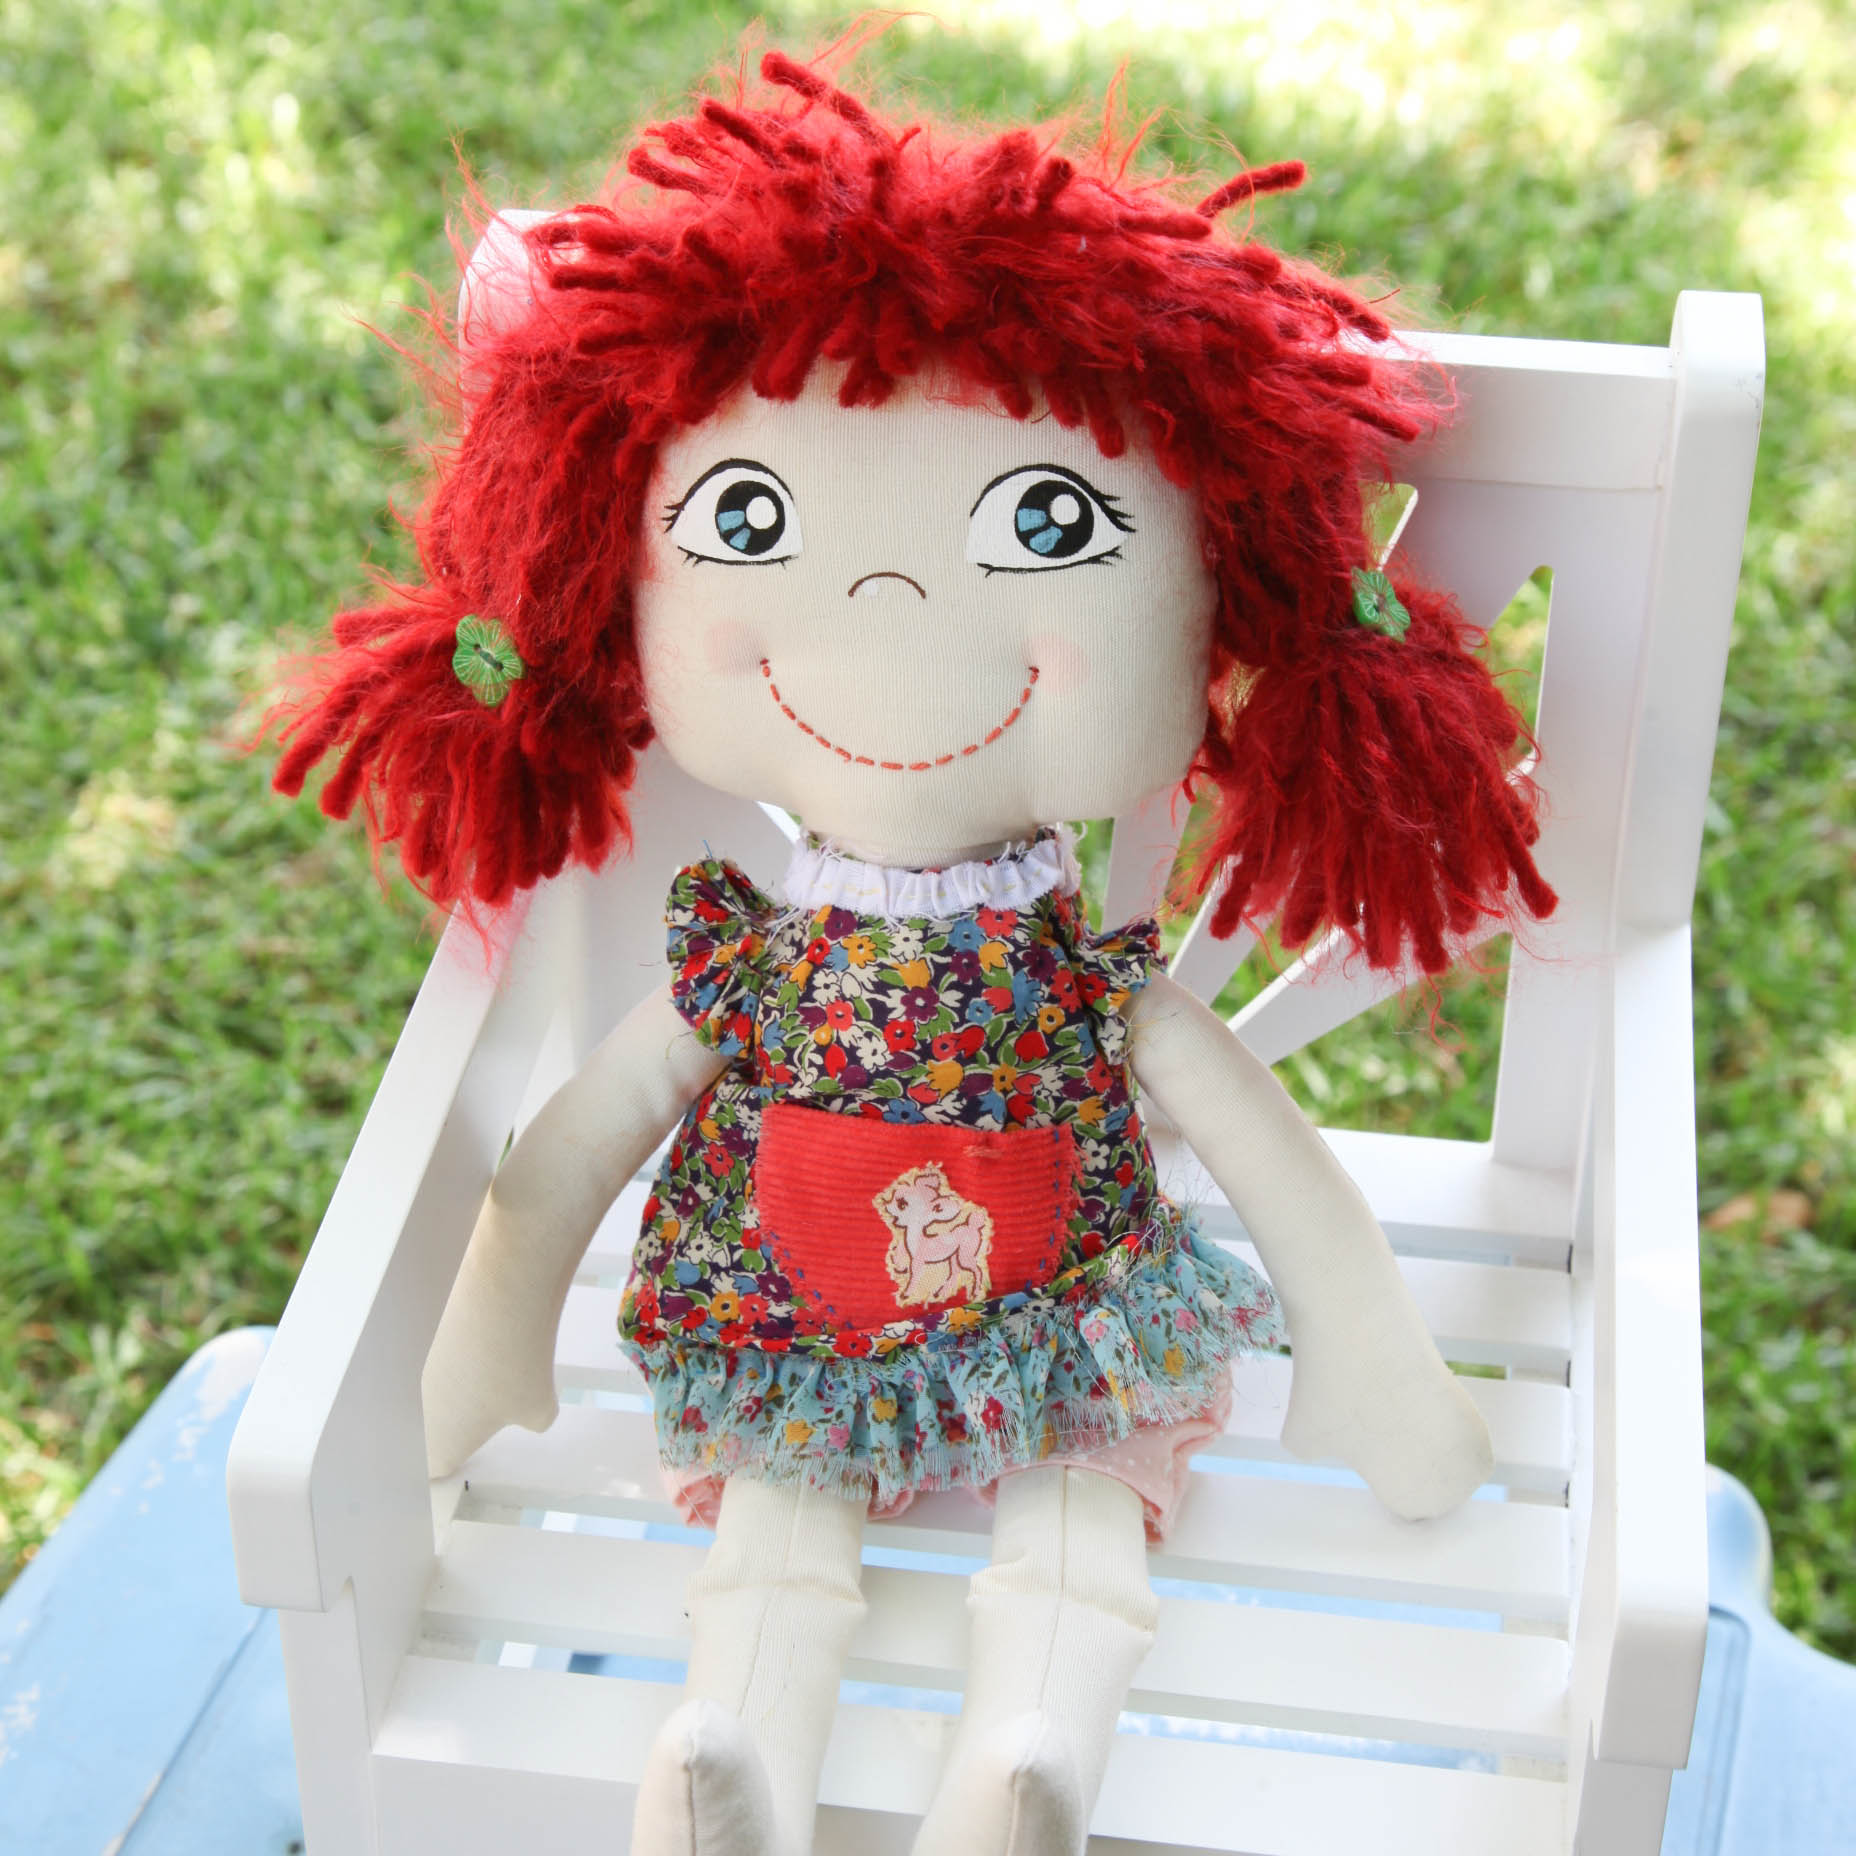
 There was a time when I was obsessed with making clothed dolls. I would literally stay up all night to finish a doll and feel enjoyment when my little daughter woke up and was thrilled with mommy’s just made doll for her.
But that’s an old story now. As I have three beautiful girls, whenever I make something it has to be three sets. A kind inspiration and creation easily end up rather tiring work.
Today my second daughter, Chloe bagged me to make a new doll for her. I had to start doll making for I could not think of an excuse any more.
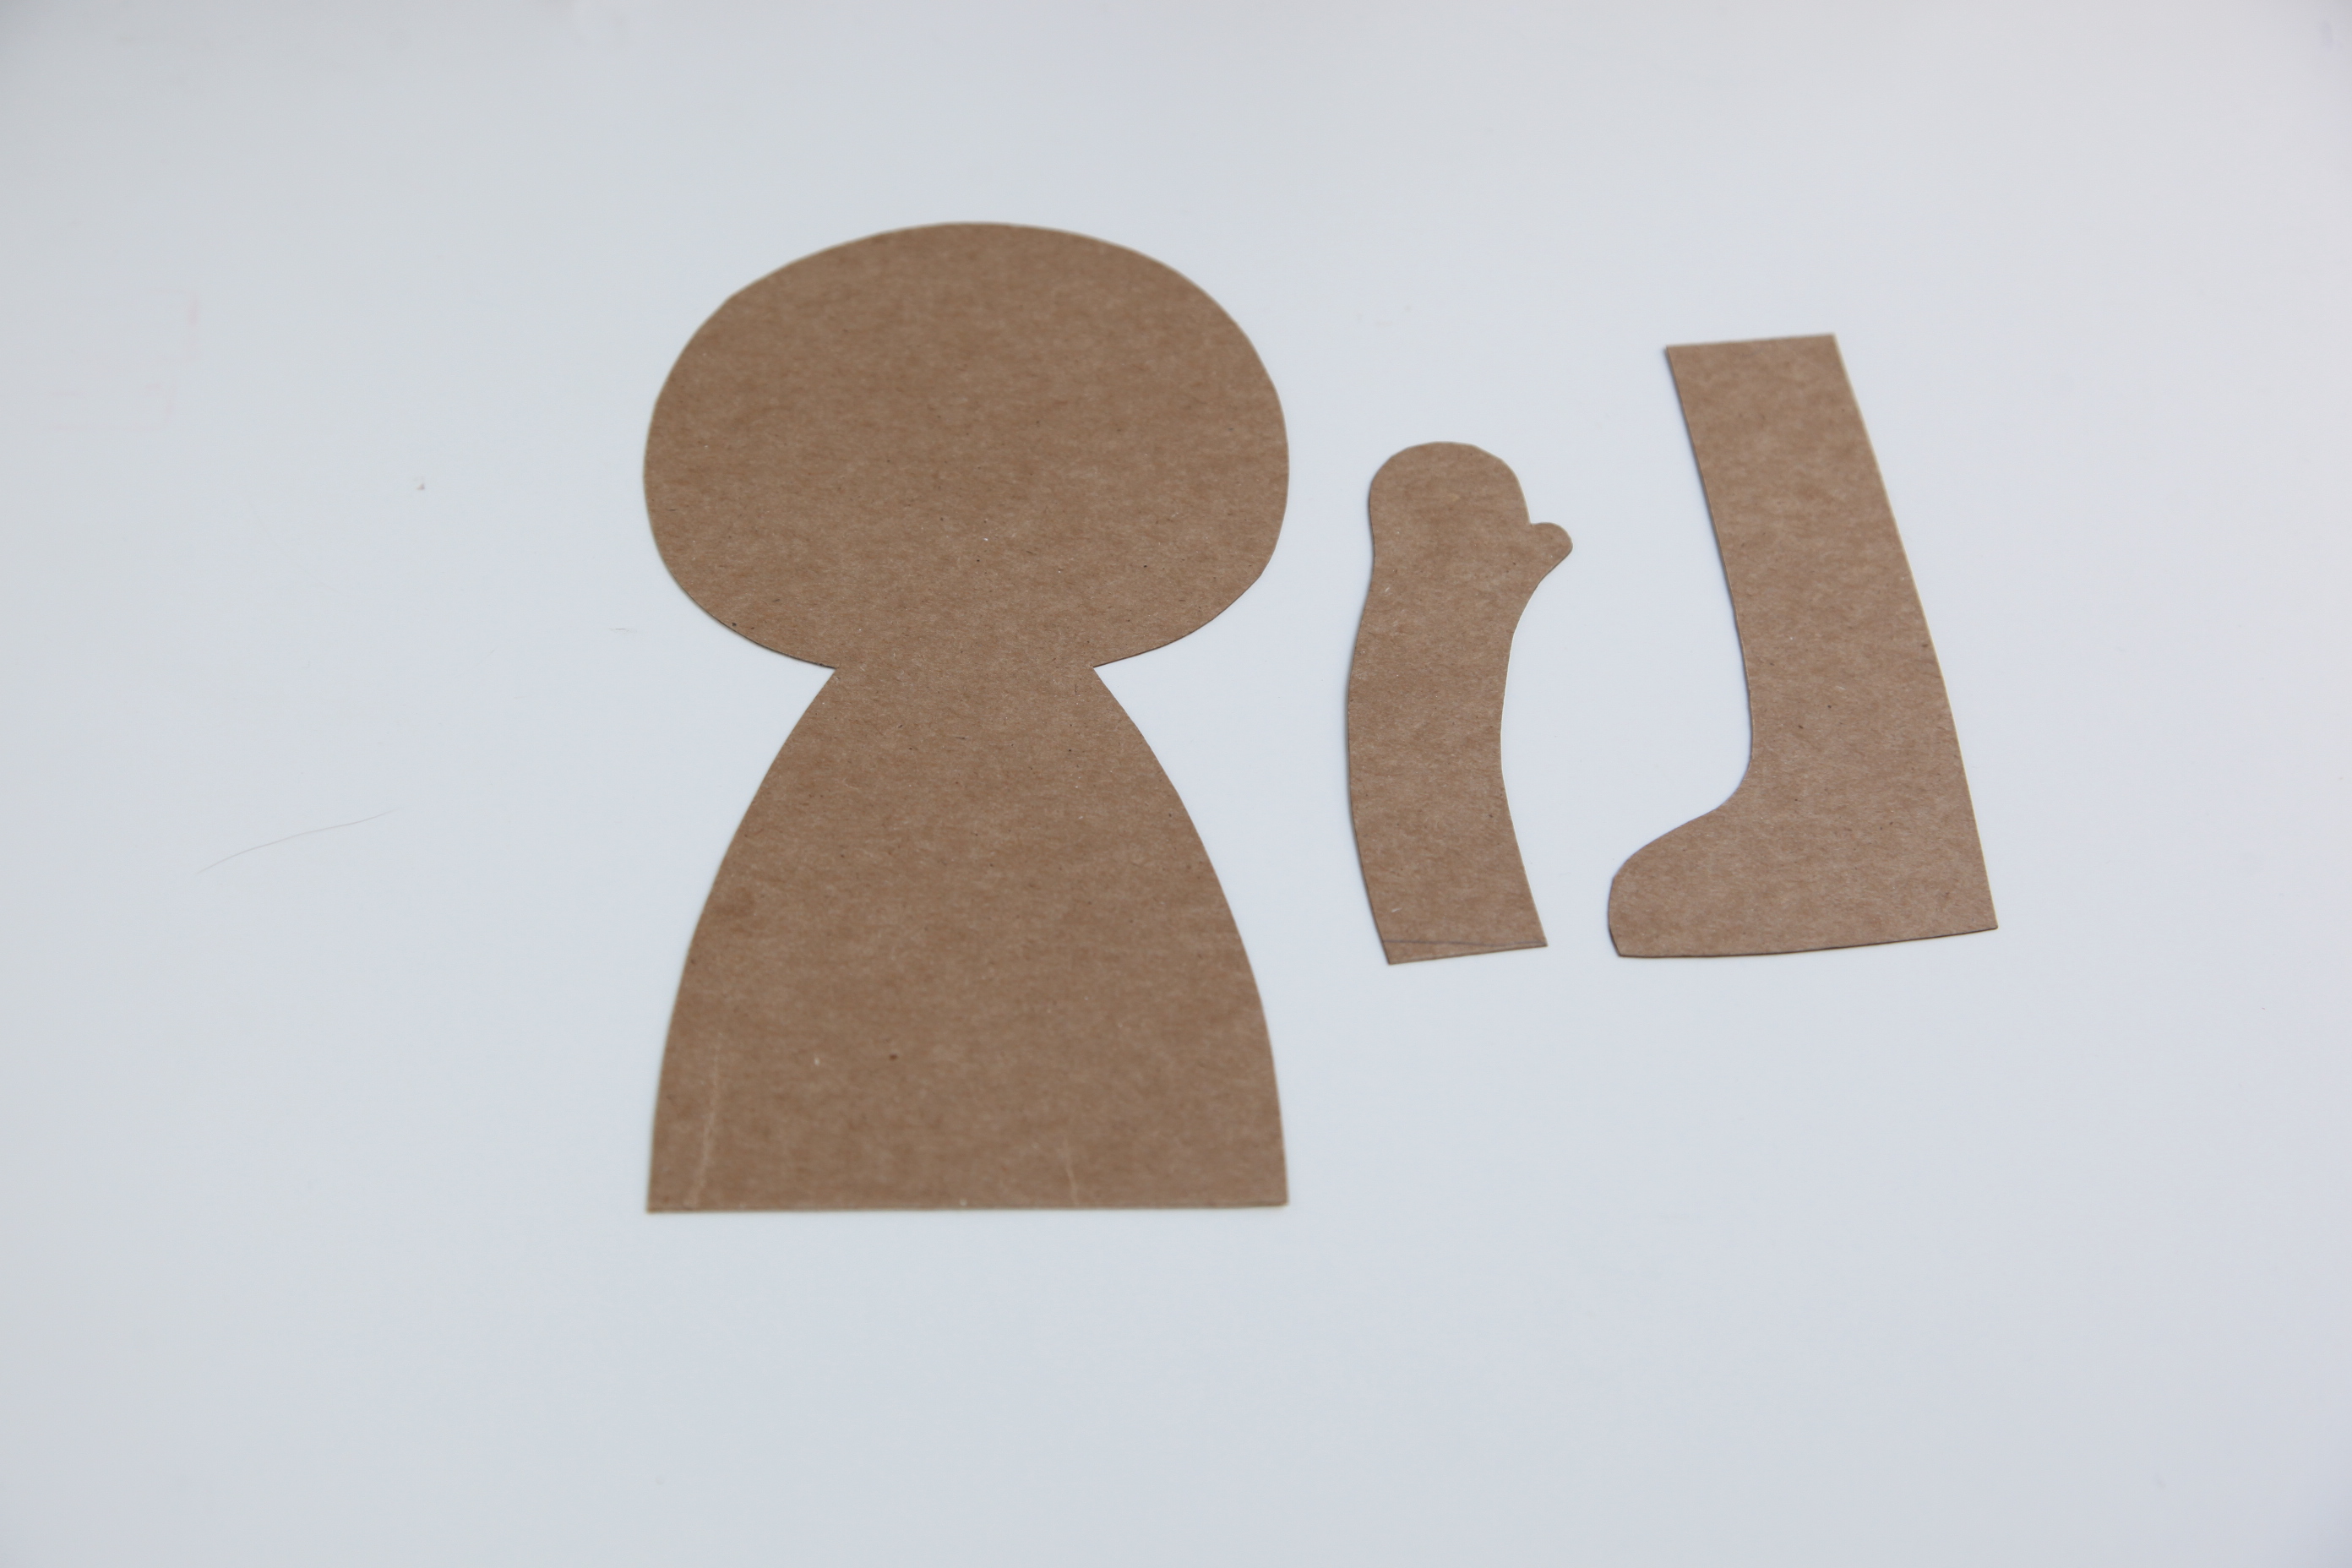
1.Make a doll pattern with hard board paper.

2.Trace pattern on skin color fabric and sew leaving a opening for stuffing.
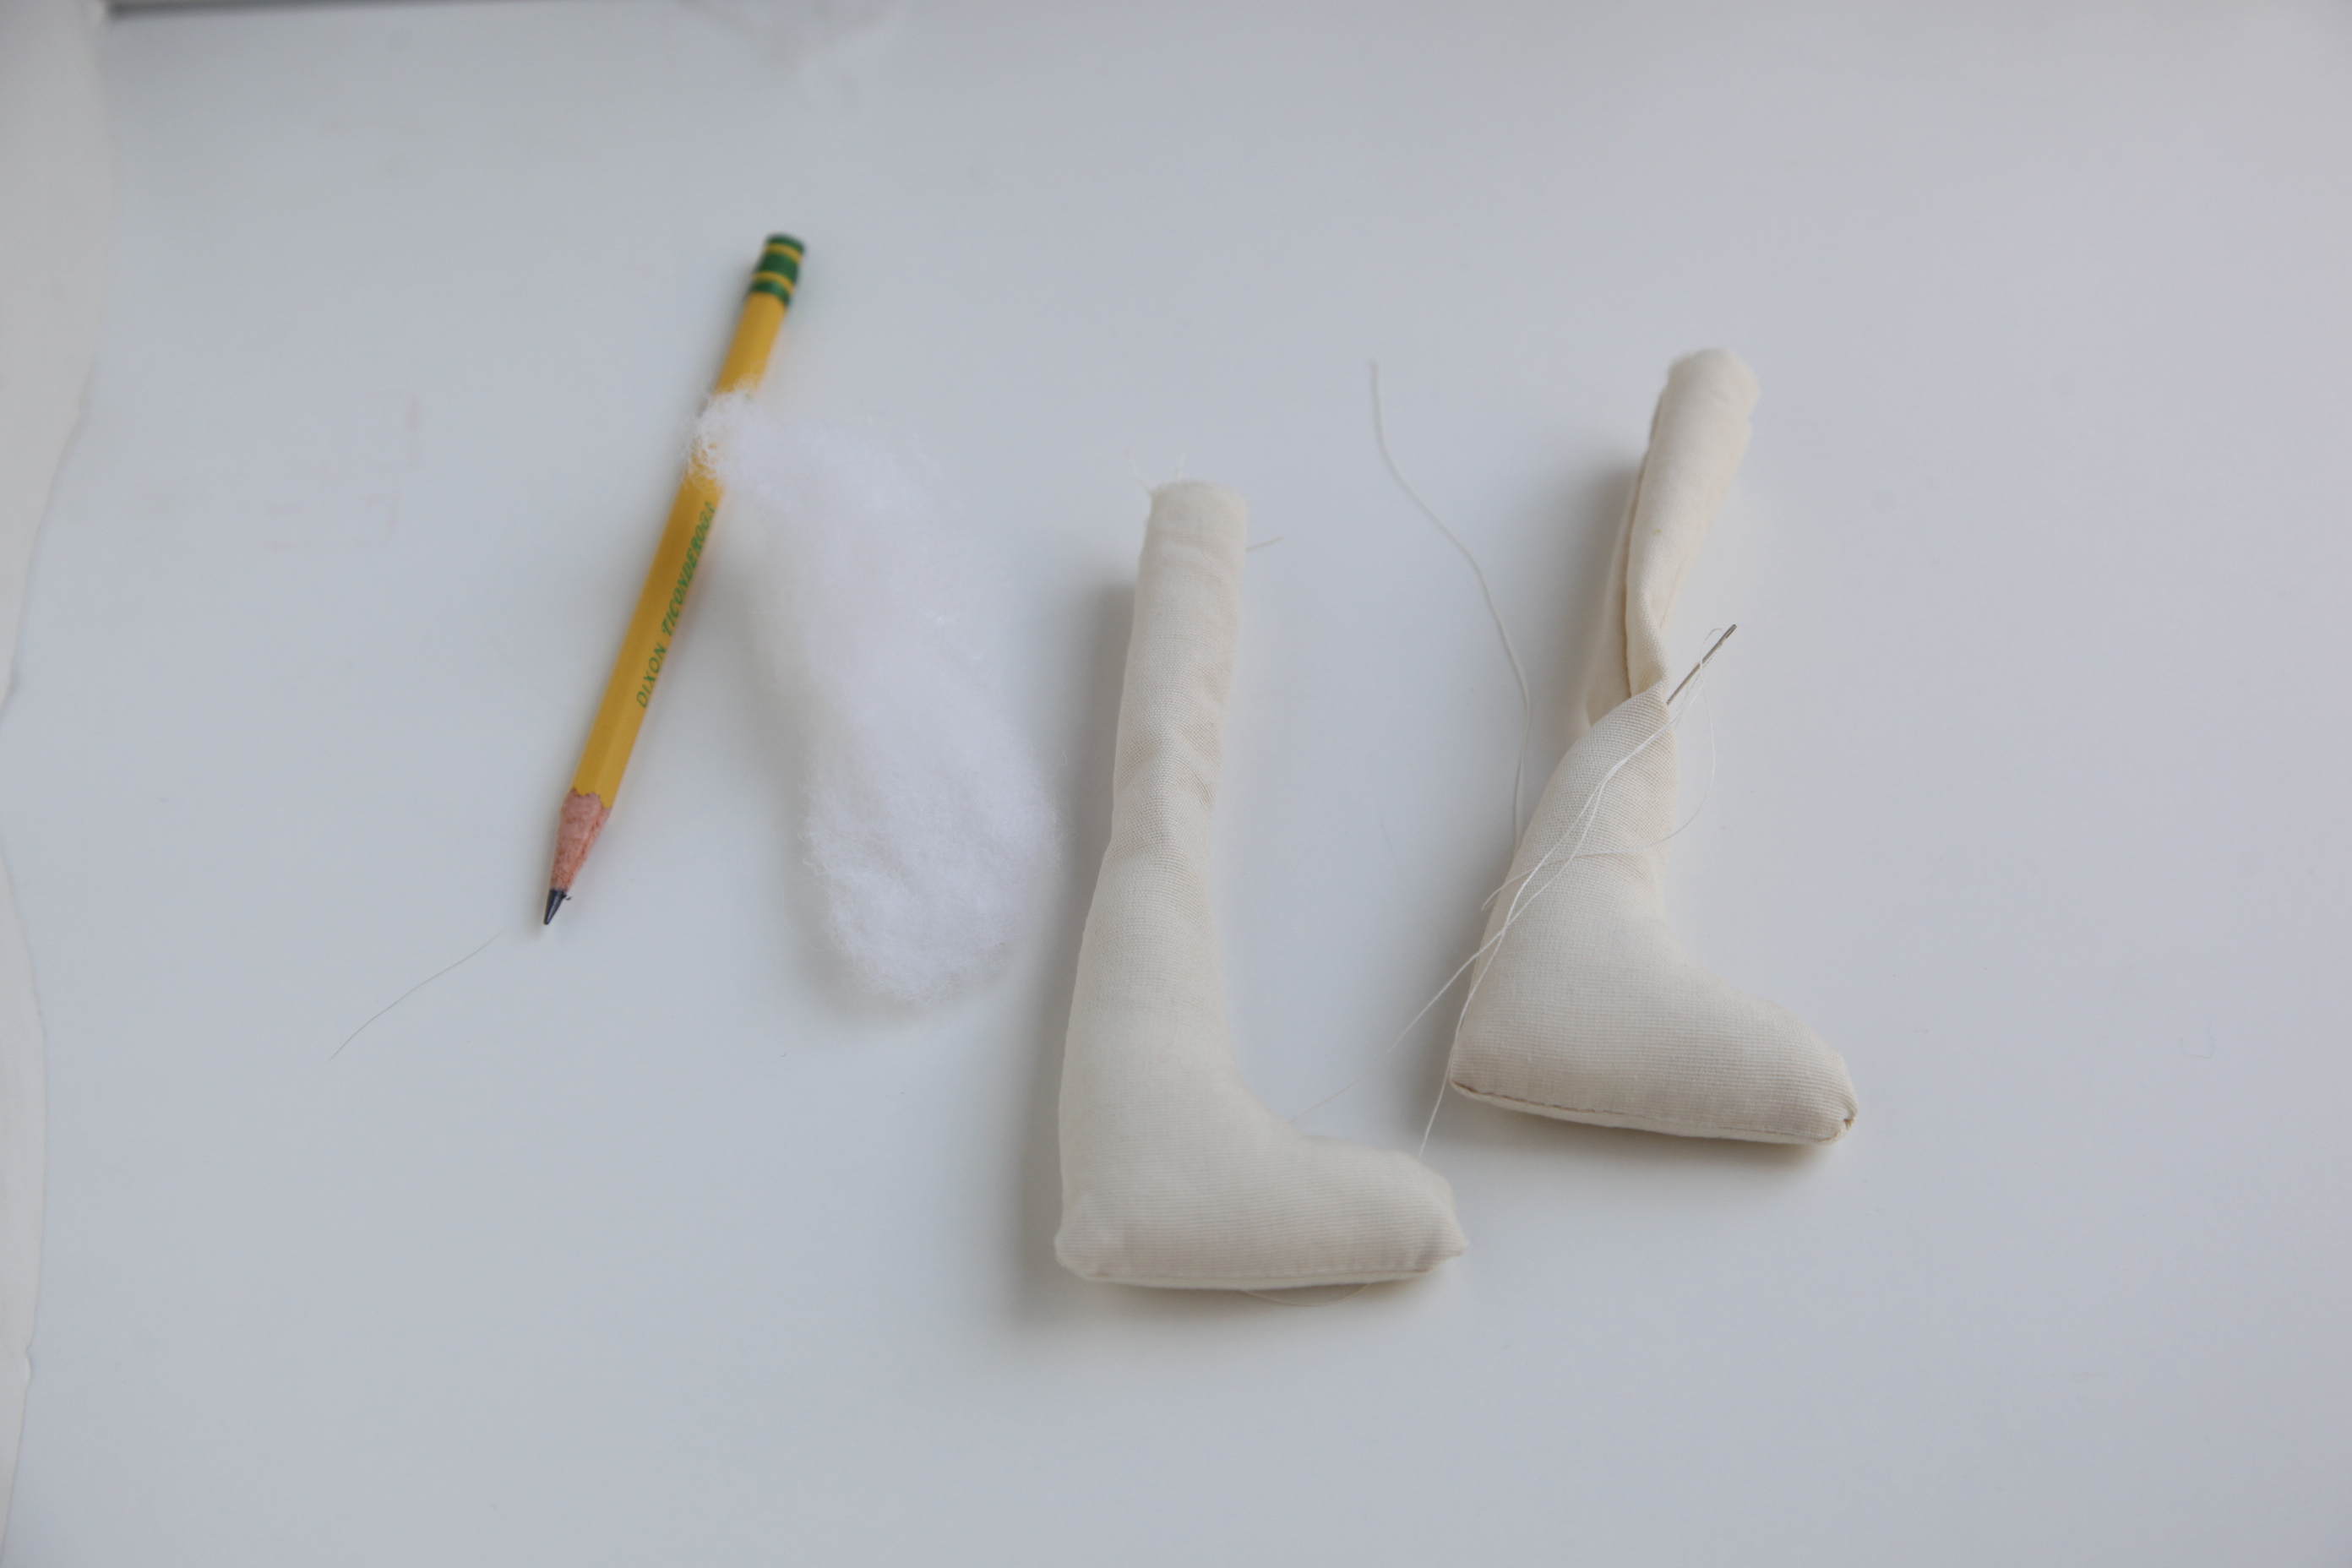
3.Use chopstick or pencil to put in your cotton.
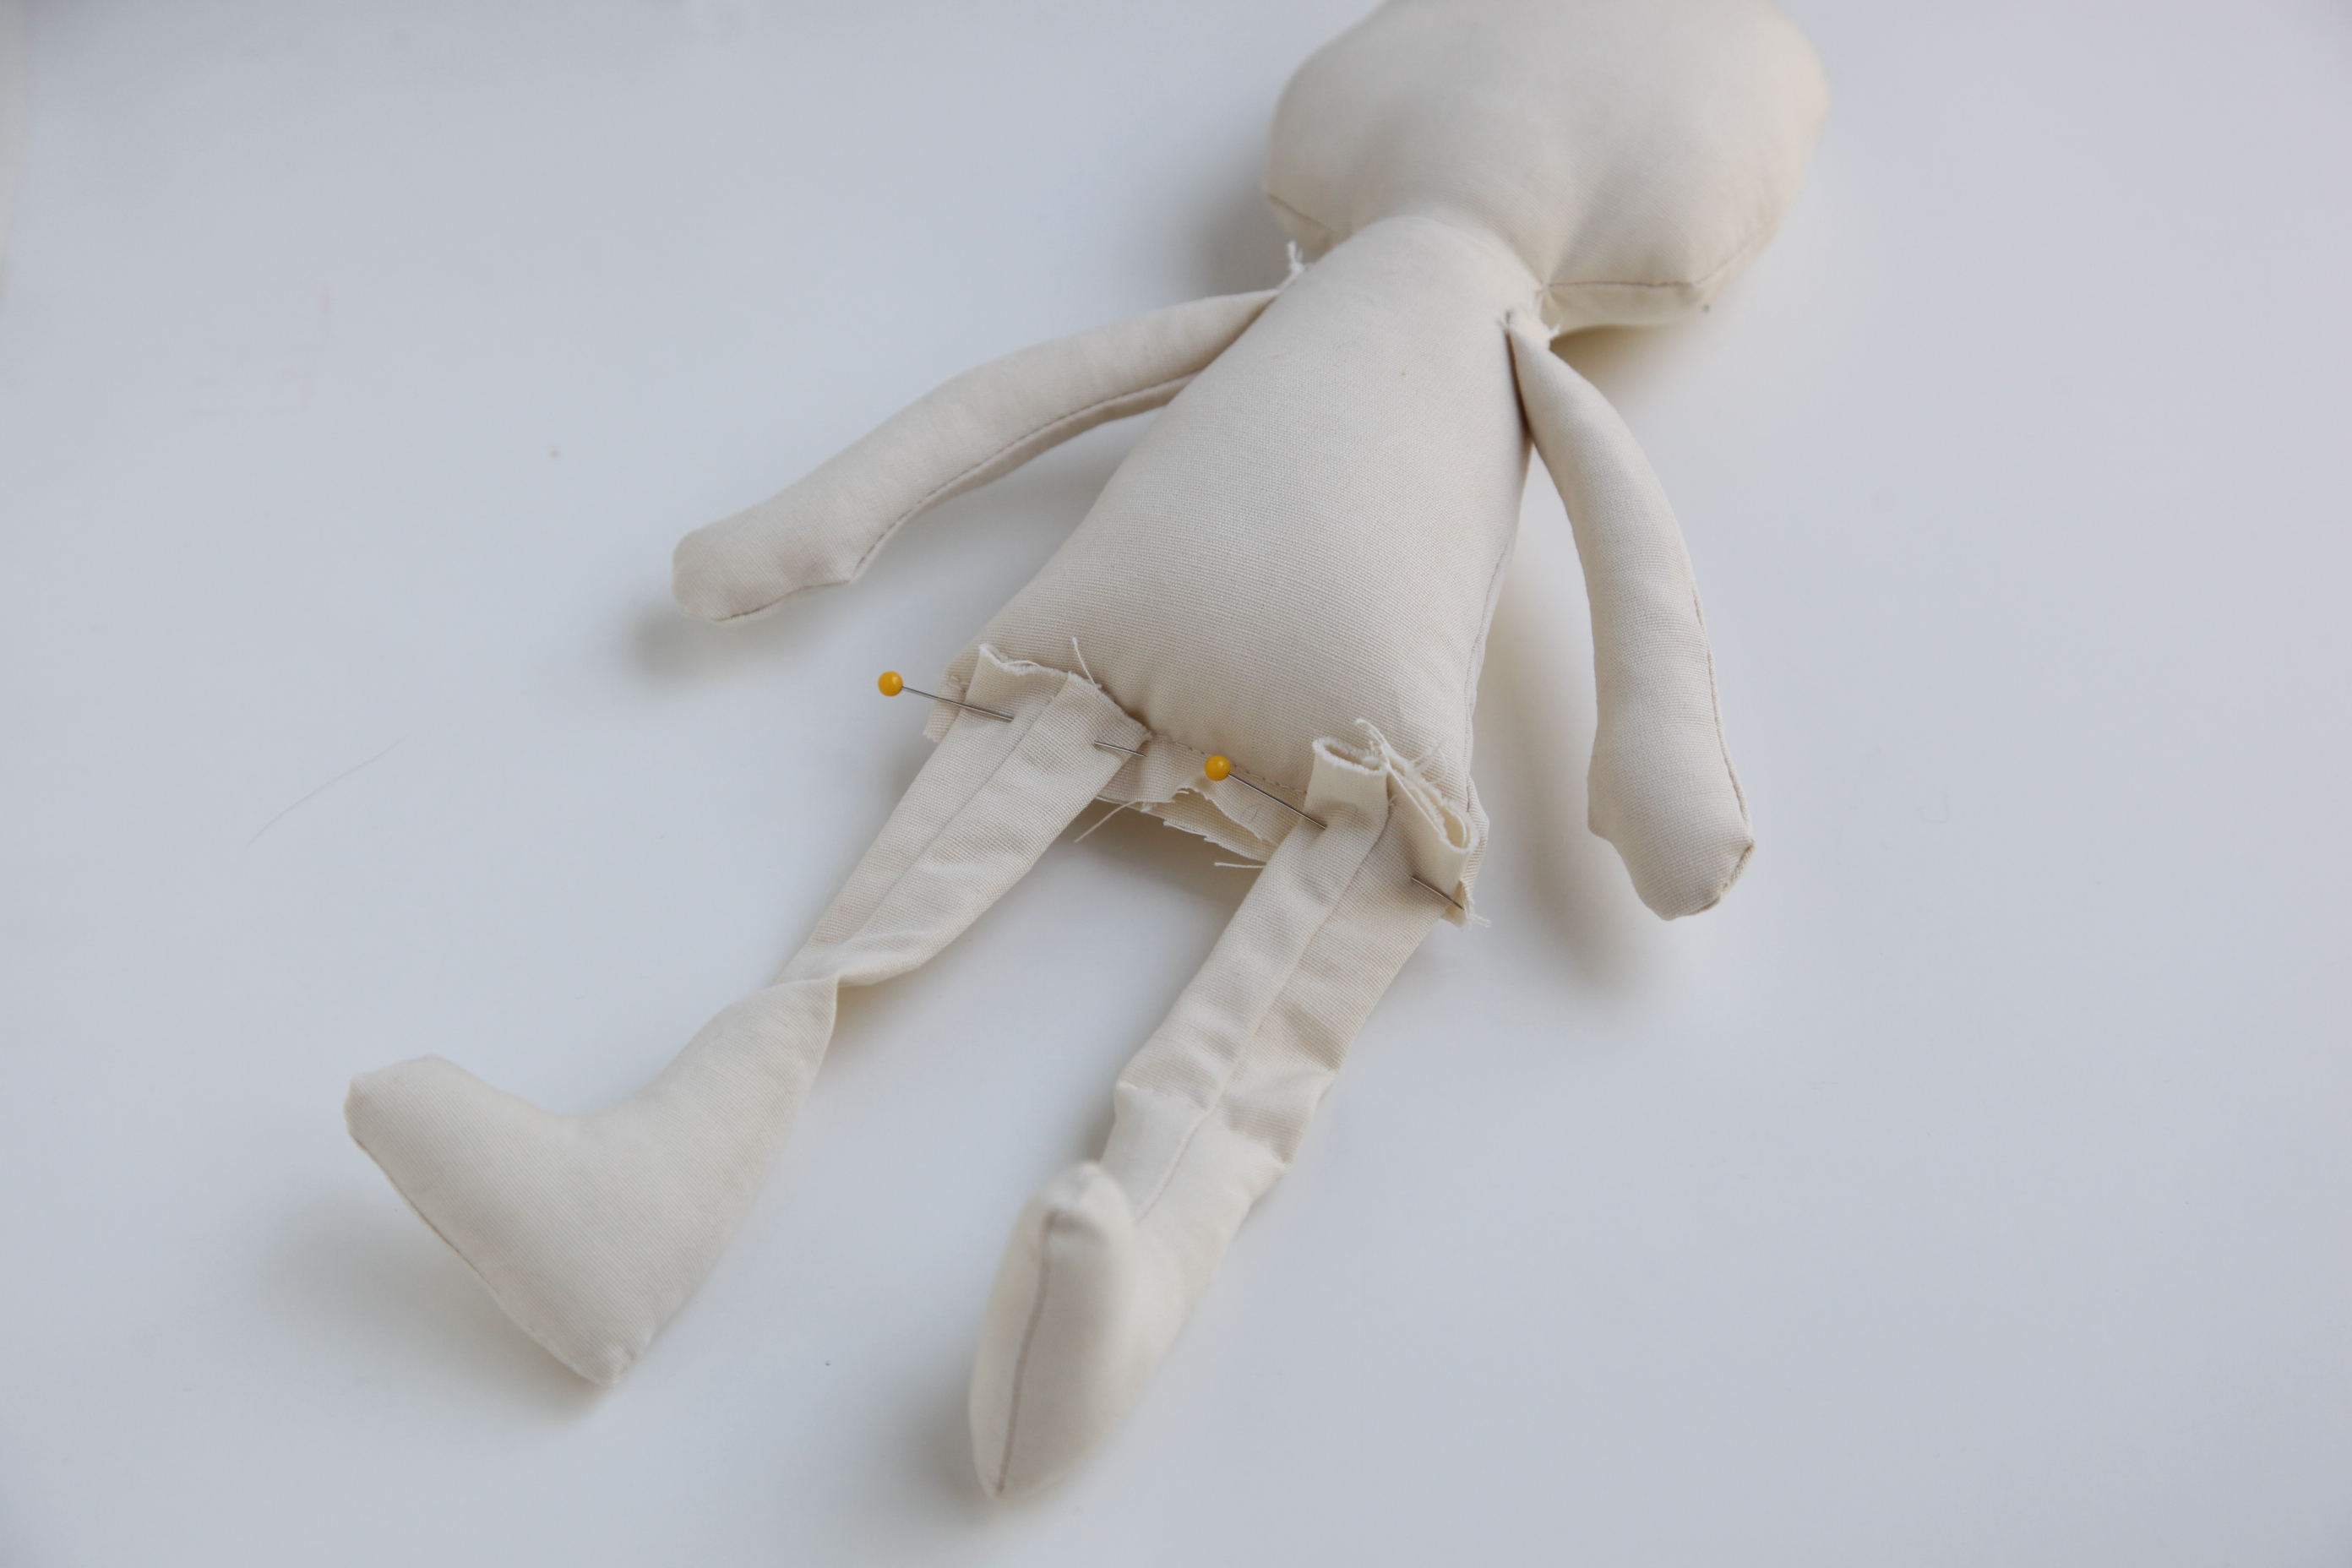
4.Attach arms and legs on the body by hand sewing.
5.Now you can design clothes for the doll. It is the most hardest but the fun part as well.
I hope you can make your own doll today.
Thank you for visiting me.
Love always,
Minki
thank you, it looks so beautiful and easy- I teach a small class of 7-12 yr old to sew, it’s very difficult sometimes to teach them to make something that’s easy enough but that they’ll love. sincerely, Sheila
A simple yet impressive way to create a cloth doll. Loved this method. I am a video games lover and also liked this website https://nosurveynodownloadverification.com for knowing the legit tricks for video games.
I really enjoyed the instructions on how to make your own rag doll at home yourself. But my question is how do you do the eyes, nose, and mouth?
In this tutorial you are going to learn how to make a cloth doll body. Need to check this https://taurangaconcrete.co.nz/ and learn more new ways for pool construction. It is a very simple doll body and I won’t be adding any clothes in this tutorial but there are many sites available on the internet that will show you how to sew clothes for a doll so if you want to learn about it, just google it out. You can also use your own creativity and add some things against the cloth body that I am going to create or have some other idea of your own.