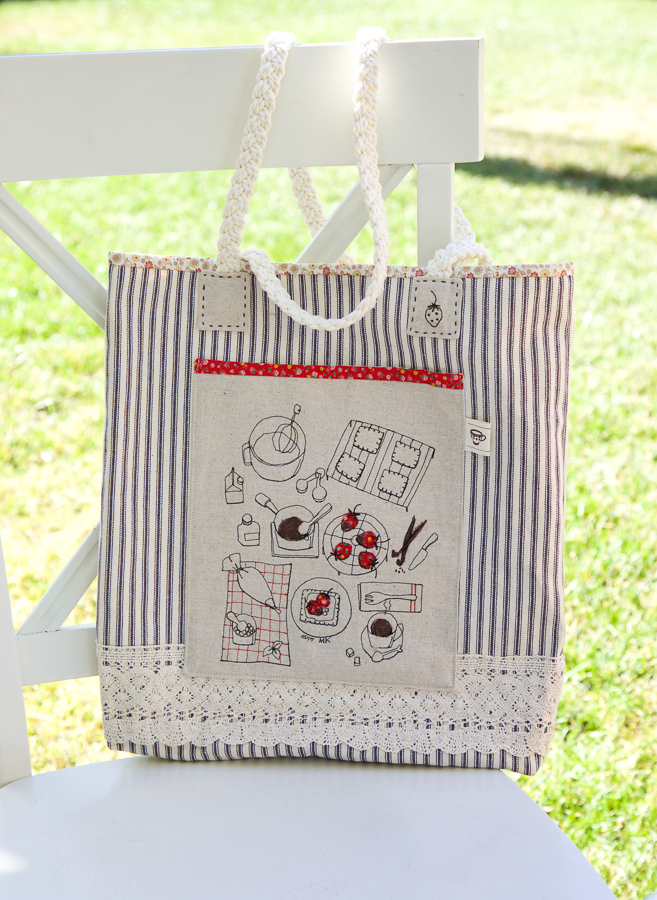
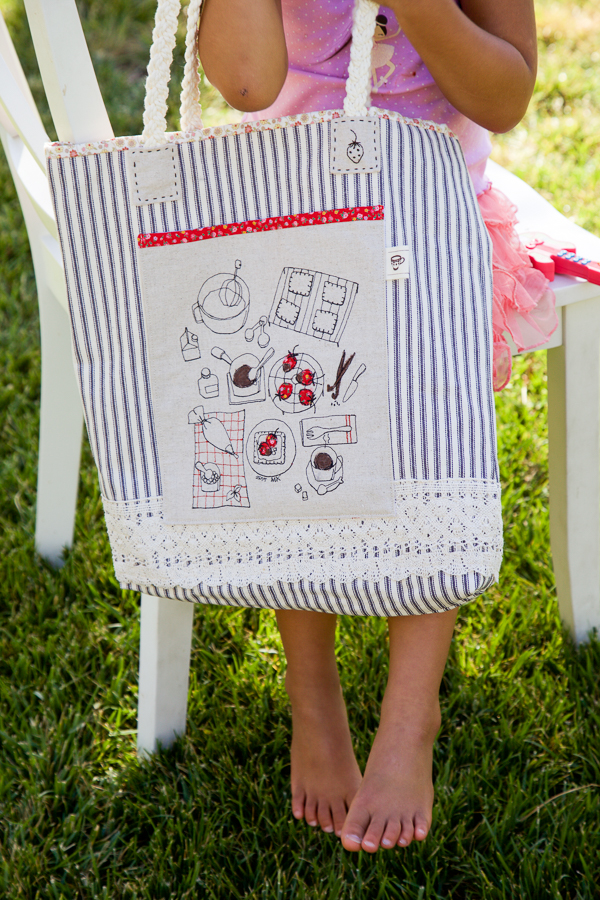
I can’t stop making tote bags lately. With my Sewing Illustraion, they are so much fun and so many uses.
I spent quite good amount of time to write this step-by-step tutorial. I hope you can make your own tote bag today.
If you are scared of Sewing Illustraion, just use your favourite cotton prints or illustrated fabric. Or recycle your little one’s old cloth!
Kids’ clothes always emboridered cute illustraions. I wonder why they don’t make same design for mama. 🙂
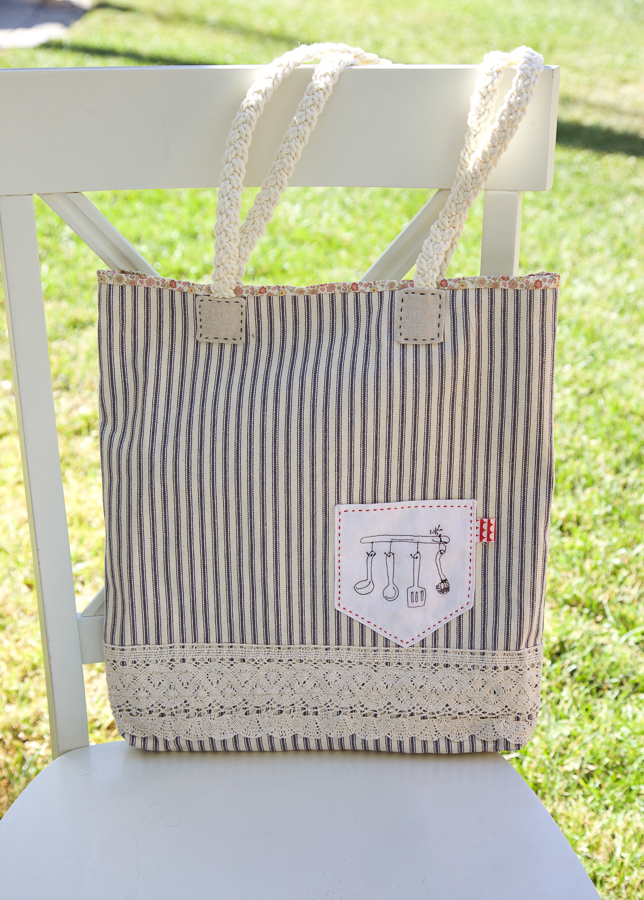
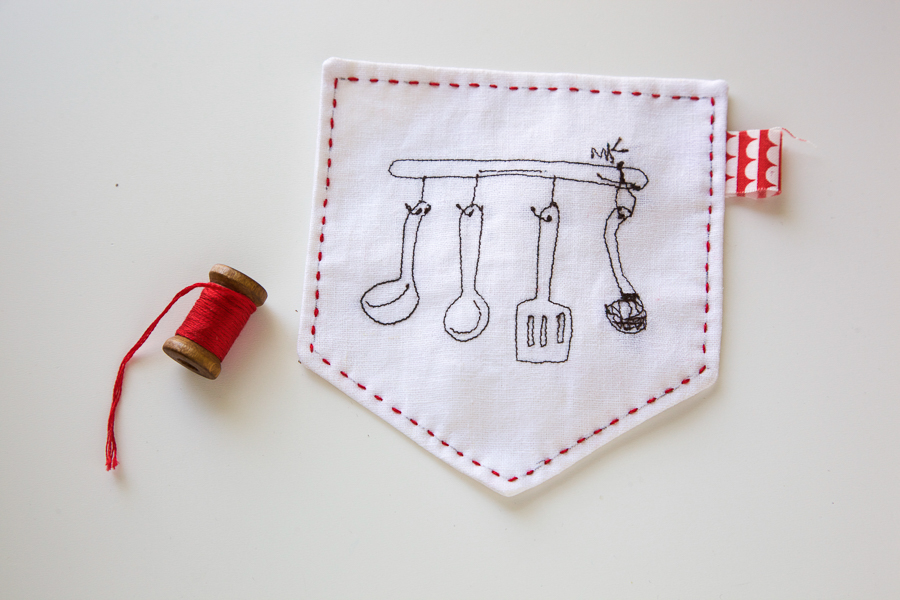
Again, I used my vey old sewing illustraion for the other side pocket. My 11year Caylin prefer this side.
What’s your fouvorite side? I guess this bag has two charms that hard to choose. *wink*
I love to decorate here and there like playing hide-and-seek. It’s so much fun to make and use.
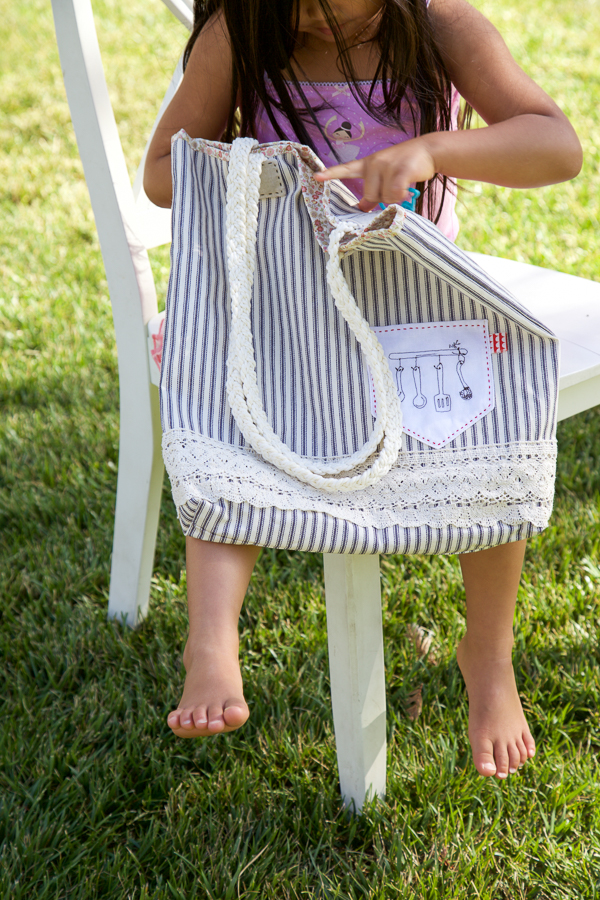
How I love to see my girl playing with mama’s bag. (to tell you the truth, she’s now tired of being a bag model. ) lol.
Hope my STRAWBERRY TOTE inspire you today.
p.s. Sorry for blocking the comments. I recieve tons of junk daily and it’s almost impossible to find your sweet comments. 🙁
How To:
You need:
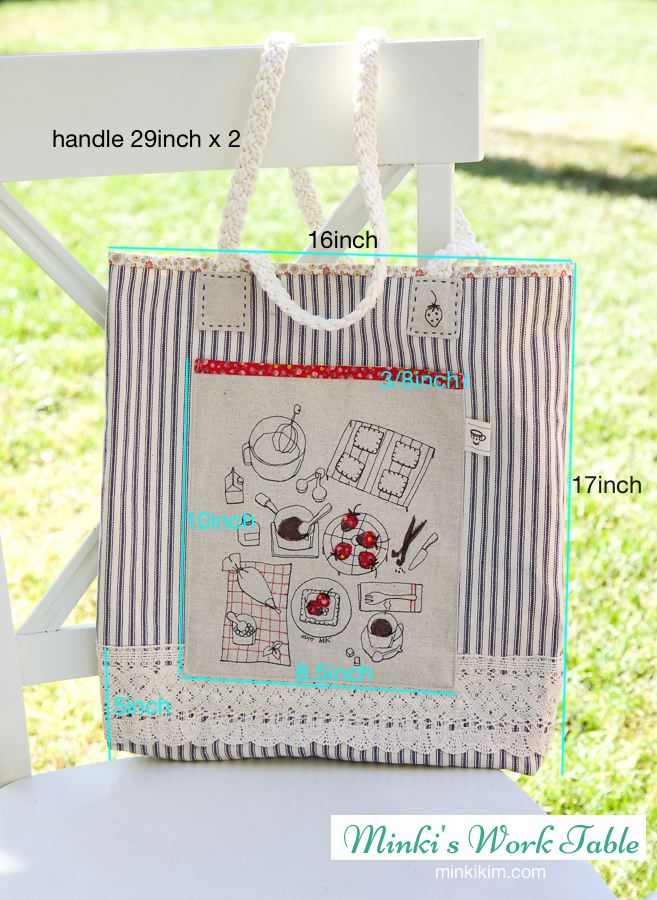
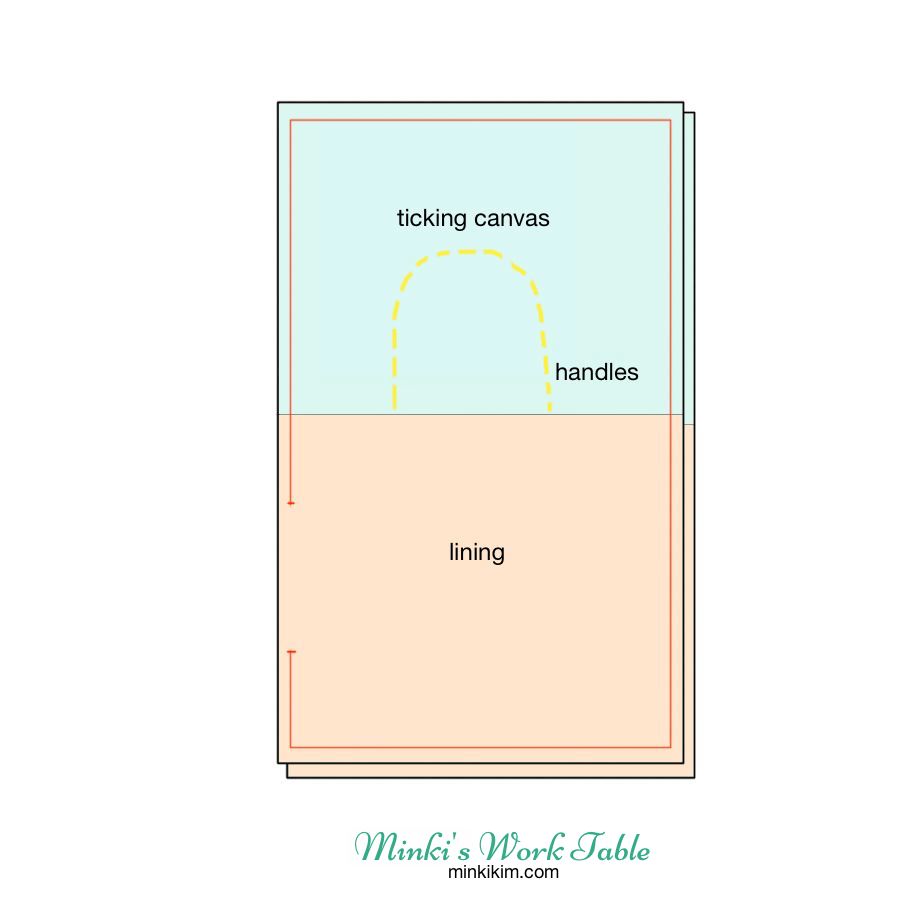
2 rectangles of blue ticking canvas 16.5 x 19inch
2 rectangles of cotton print 16.5 x 18inch for bag lining
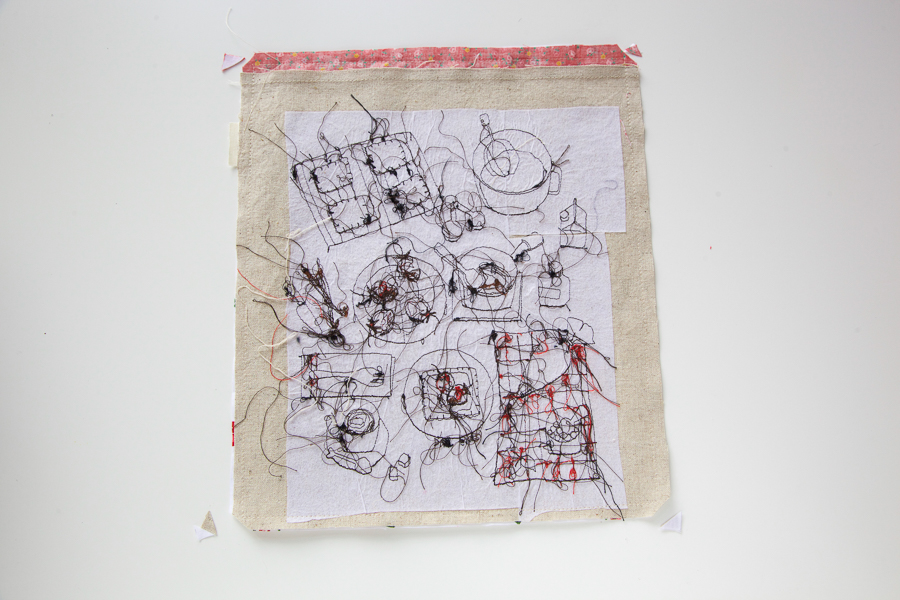
1 rectangels of linen (sewing illustrated or hand embroidery) 9 x 10inch for pocket
1 rectangls of cotton print 9 x 10 for pocket lining
1 rectangles of cotton print 9 x 16inch for inside pocket
1 lace 9inch for inside pocket decoration
1 rectangles of red cotton print 9 x 1 1/4inch for pocket upper binding
2 cotton lace 10inch
2 cotton handles 29inch
8 rectangles of linen 2 x 2 1/4inch for handle cover
1 cotton lable for pocket decoration
2 buttons for inside pocket decoration
brown embroidery floss
red embroidery floss
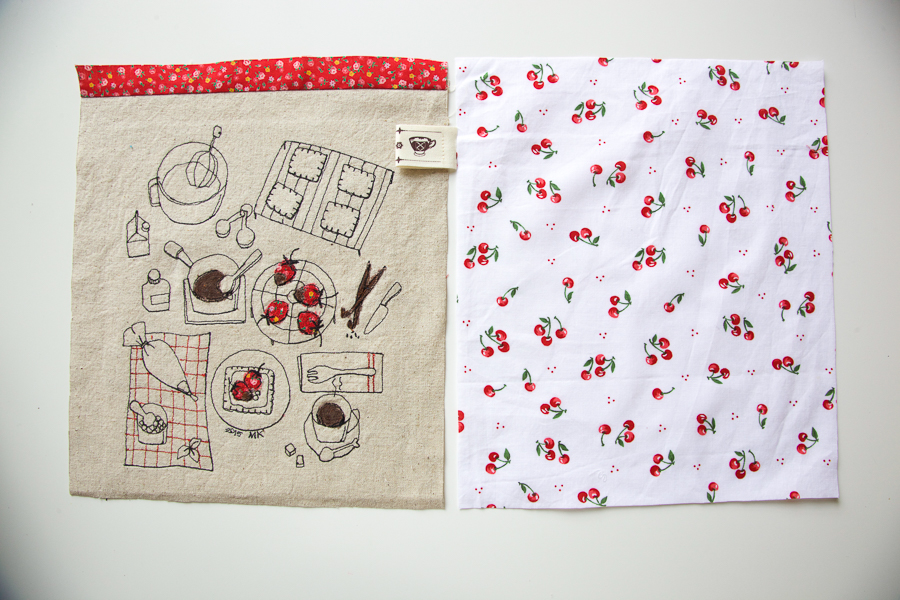
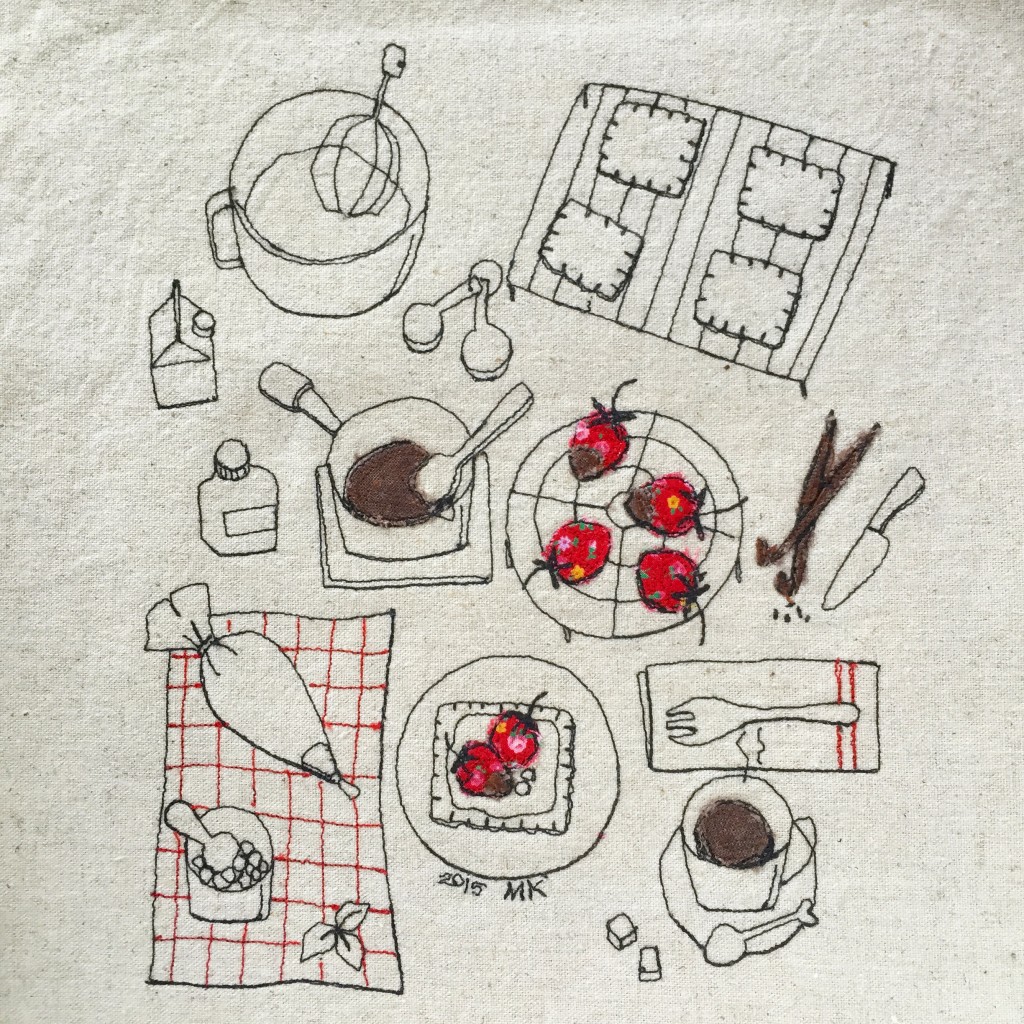
1.Sew red cotton print and illustrated linen right side facing. press seam toword red print.
2.Insert cotton label and sew linen and lining right side facing, leaving a 2″ opening. Clip the corners.
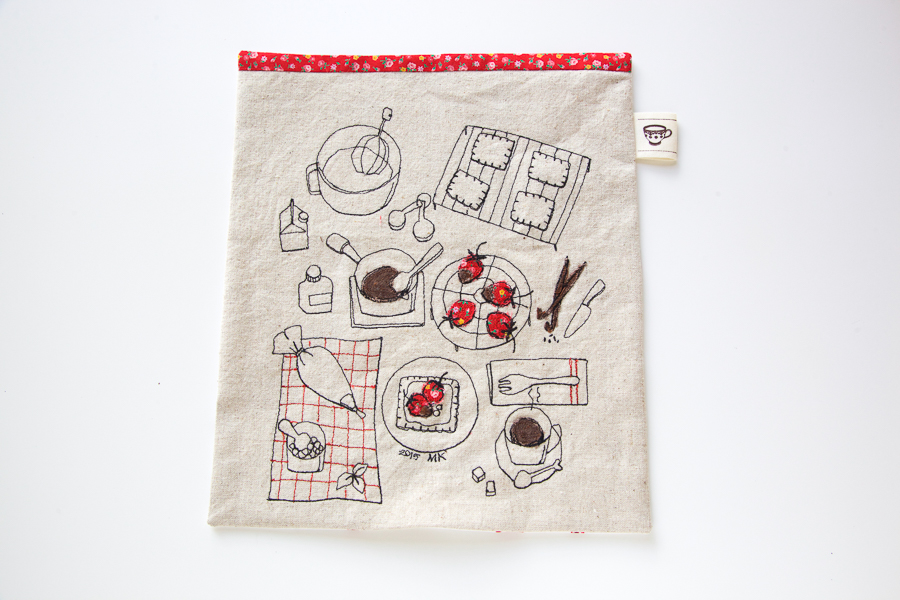
3.Turn right side out, easing out the corners, and press well. (I iron it)
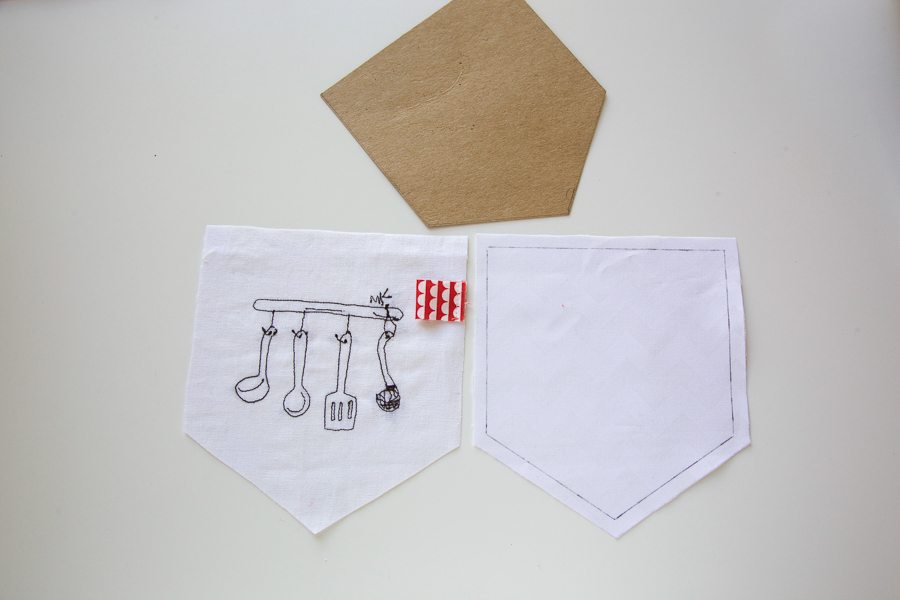
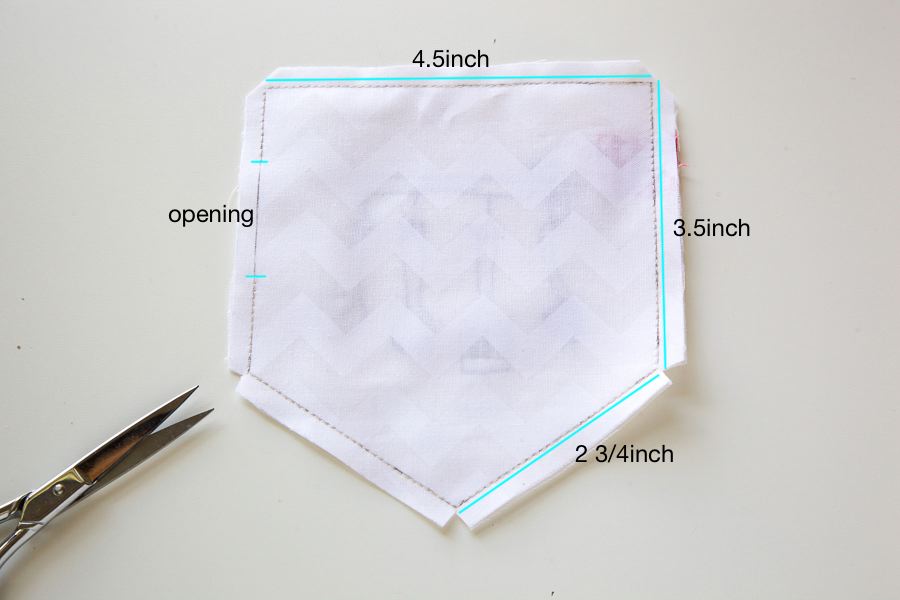
4.With hardboard paper make a pocket tamplet. half fold cotton scraps 1/8″ seam
5.Sew the other pocket as shown. don’t need to close the opening. running stitch with 3stands of red floss.

6.Sew the cotton lace on the ticking canvas 5 1/4″ from the bottom
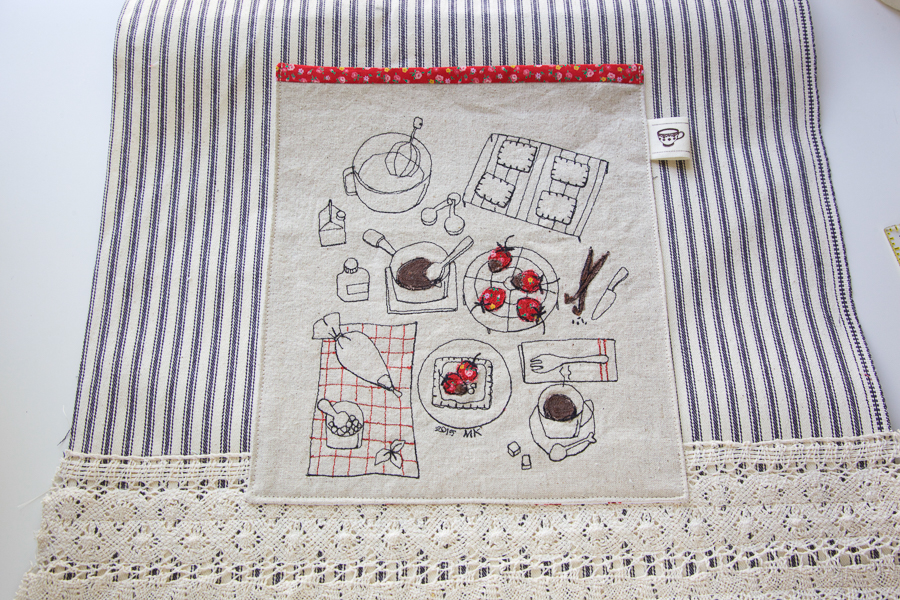
7.Mark the center and sew the finished linen pocket.

8.Sew the pocket on the other side of ticking canvas as shown.
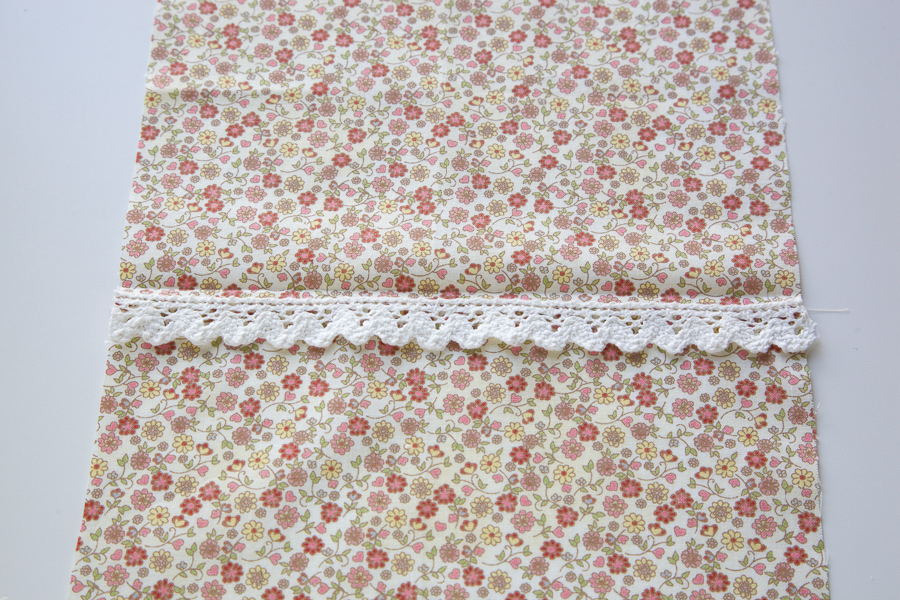
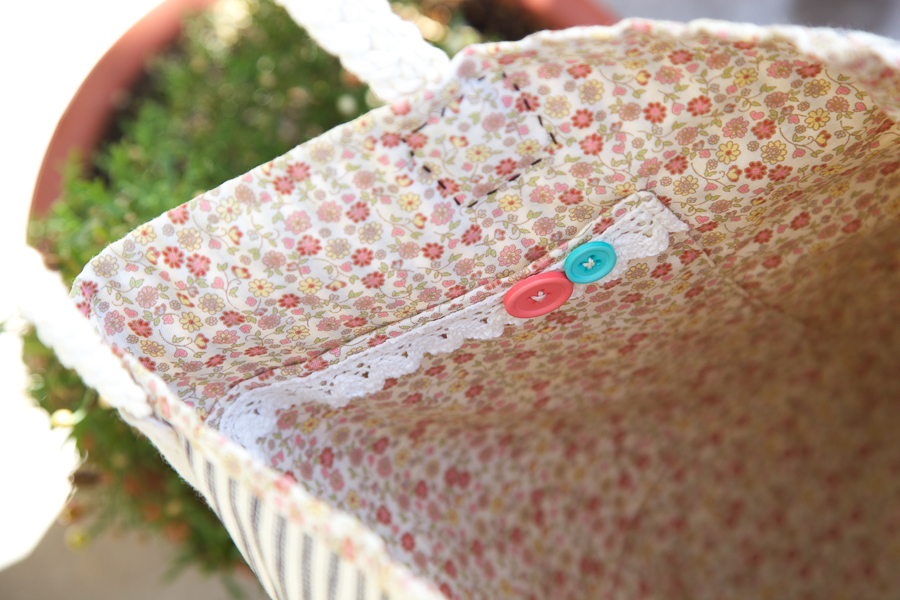
9.Fold in half of inside poket cotton and sew the lace 1/4″ from the fold line.
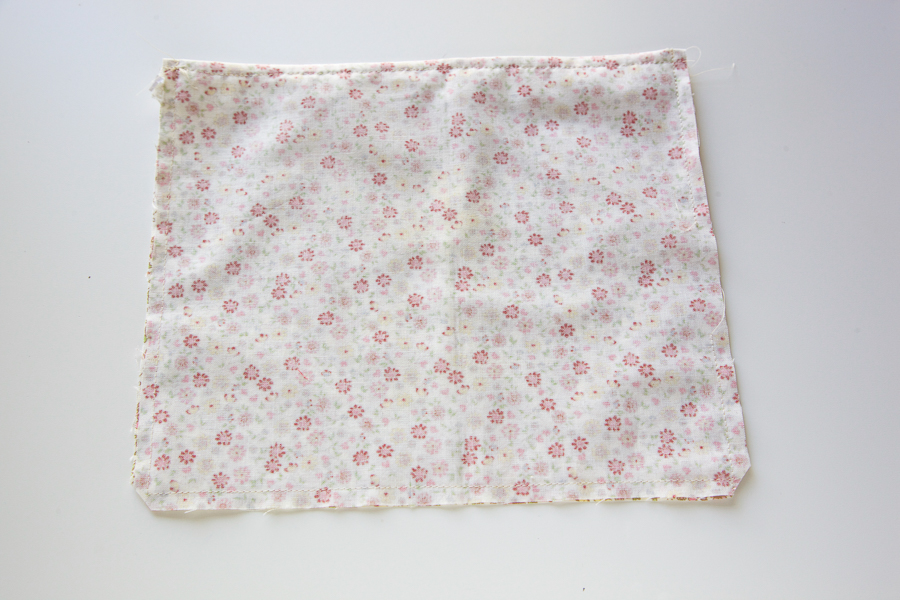
10.Fold in half, right side facing. sew, leaving a 2″ opening. clip the bottom corners only.
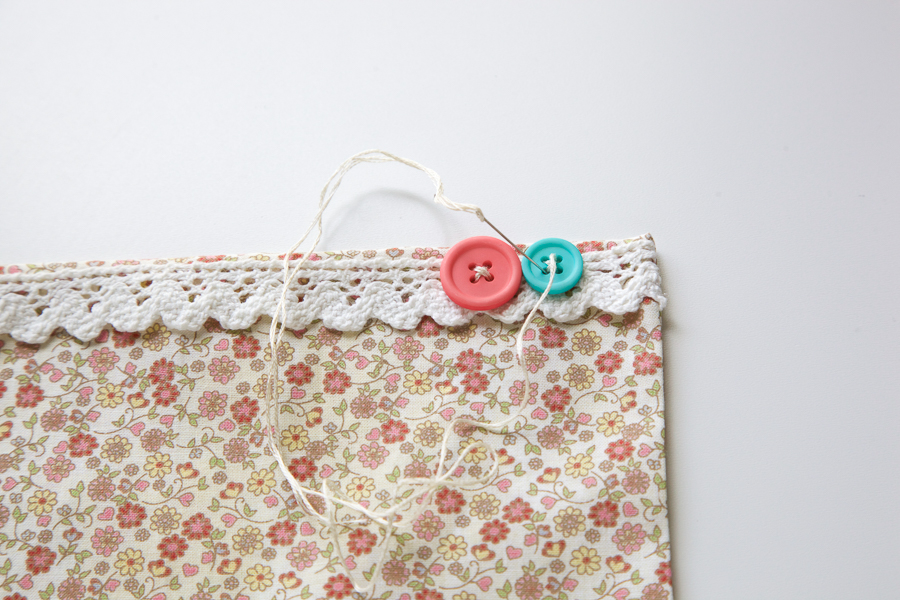
11. Turn right side out, press and hand stitch two buttons with embroidery floss.
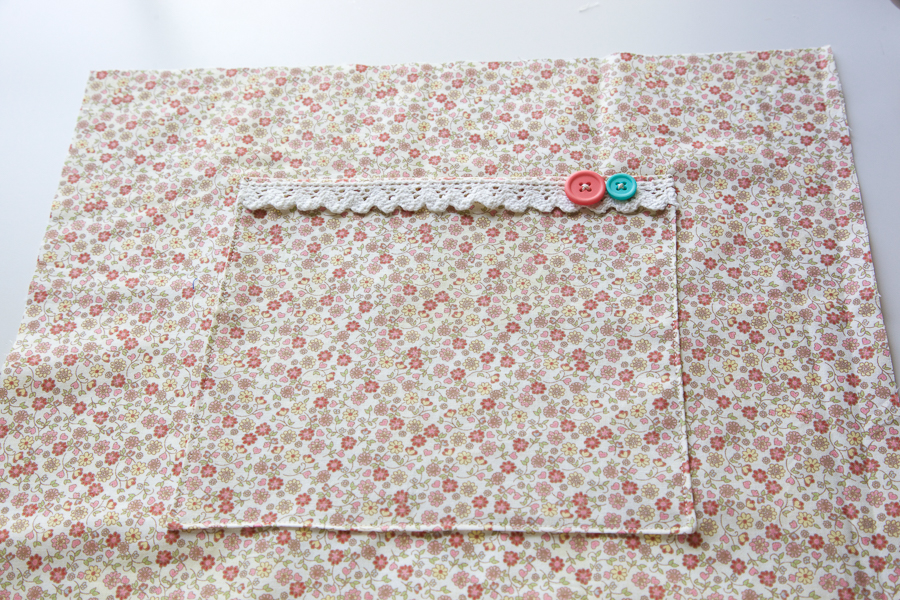
12.Sew the poket on the center of the lining.

13. Sew the ticking canvas and linging, right side facing.
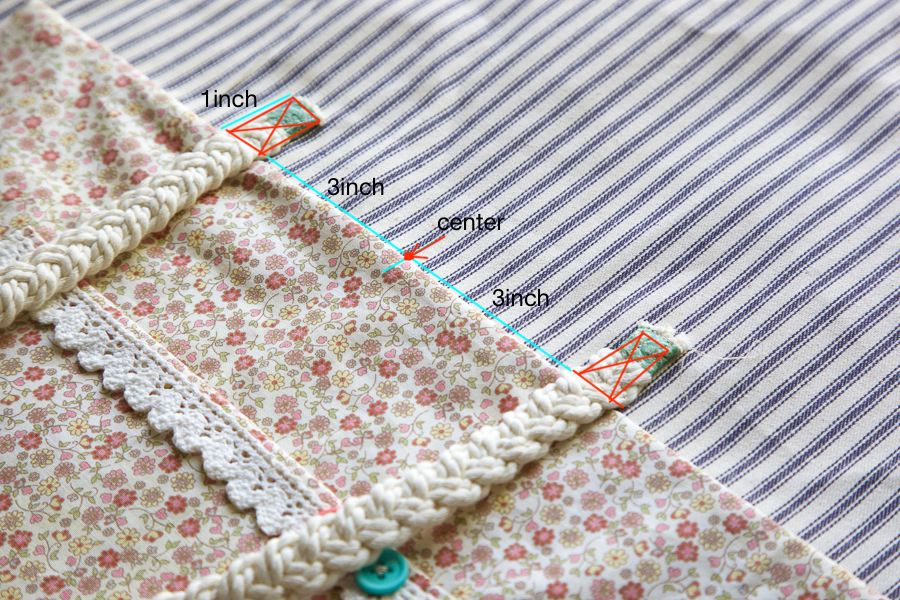
14.Sew handles to the bag, 3″ apart from center and 1″ below. Sew multiful times.
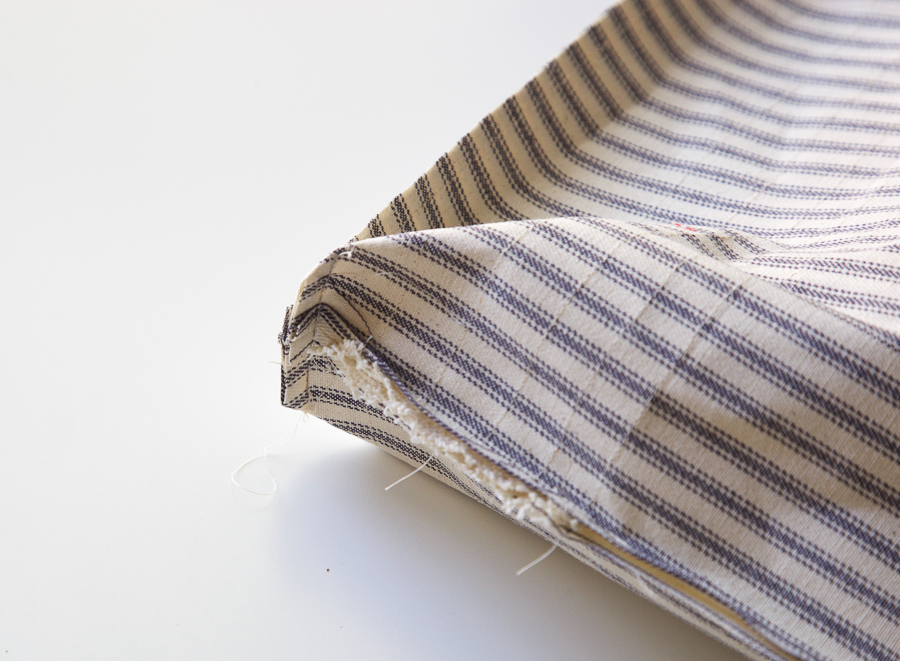
15.Sew along sides and bottom of bag, facing right side together as shown. Fold the bottom corners into a triangle and mark 3″.
Sew croos this line, repeat other side and the lining bottom too.
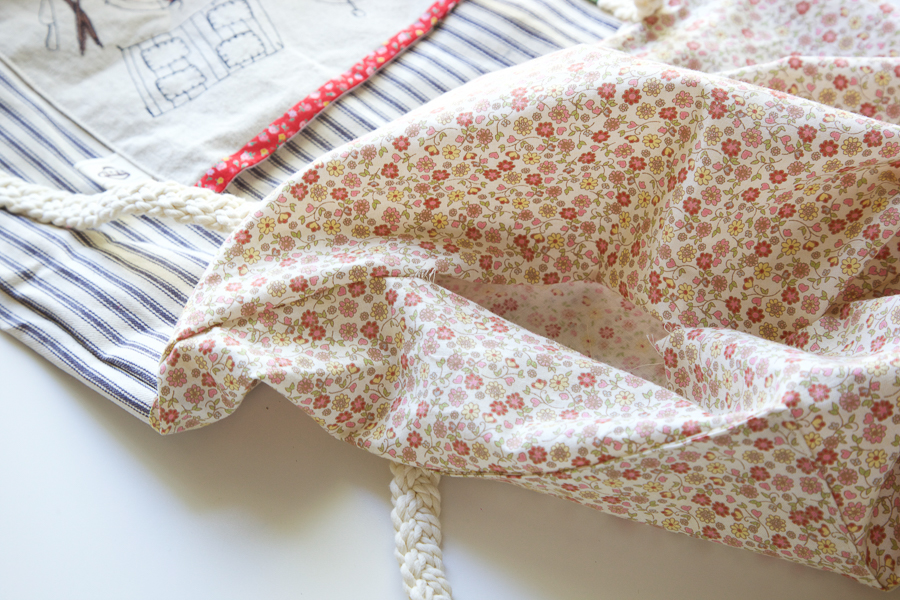
16.Turn right side out. Close the opening by hand.
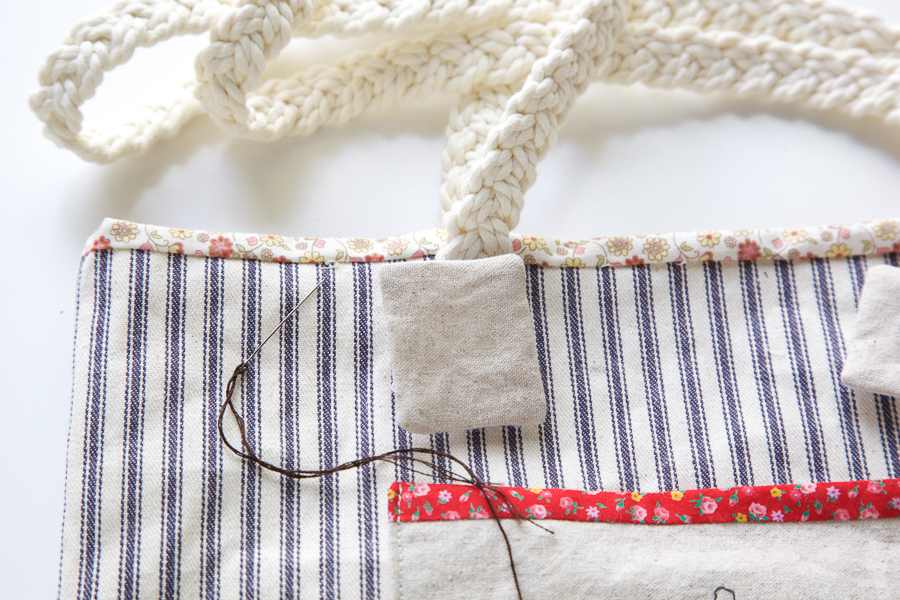
17.Sew 4 linen squares and hand stitch on the handles using 3 stands of embroidery floss
*I got this handle cover idea from Amy’s book ,Sweetly stitched handmade.
18.Embroider strawberry on one linen square using 2stands of brown DMC floss.
Thanks for the information. I also want to share an interesting news for food lovers. You can get a free sandwich by participating in the Mycfavisit survey at https://www.mycfavisit.blog/